How to include Selected Lead Attributes in your Email Messaging
With Gather’s email editor and ability to collect select data about leads and advocates you can now personalise your Gather messaging even further!
Personalisation is key to maximising your ROI from a conversion or lead-gen campaign. Gather allows you to collate select data about your campaign users using the select fields when they sign up. This information is synchronised with your account integrations e.g. Klaviyo which enable you to send targeted information to your customers.
Gather also enables you to use that information, in messaging you send through your Gather campaign. In the same way that Gather’s email editor enables you to include merge tags, you can also use these select variables in your Gather email messaging.
In this article we will show you one example of how you can personalise your opt-in campaign using information you have collects about leads during their sign-up process.
Select Field Data
In addition to name, email and phone number Gather enables you to collect additional information about leads or advocates (and their friends) during the sign-up process.

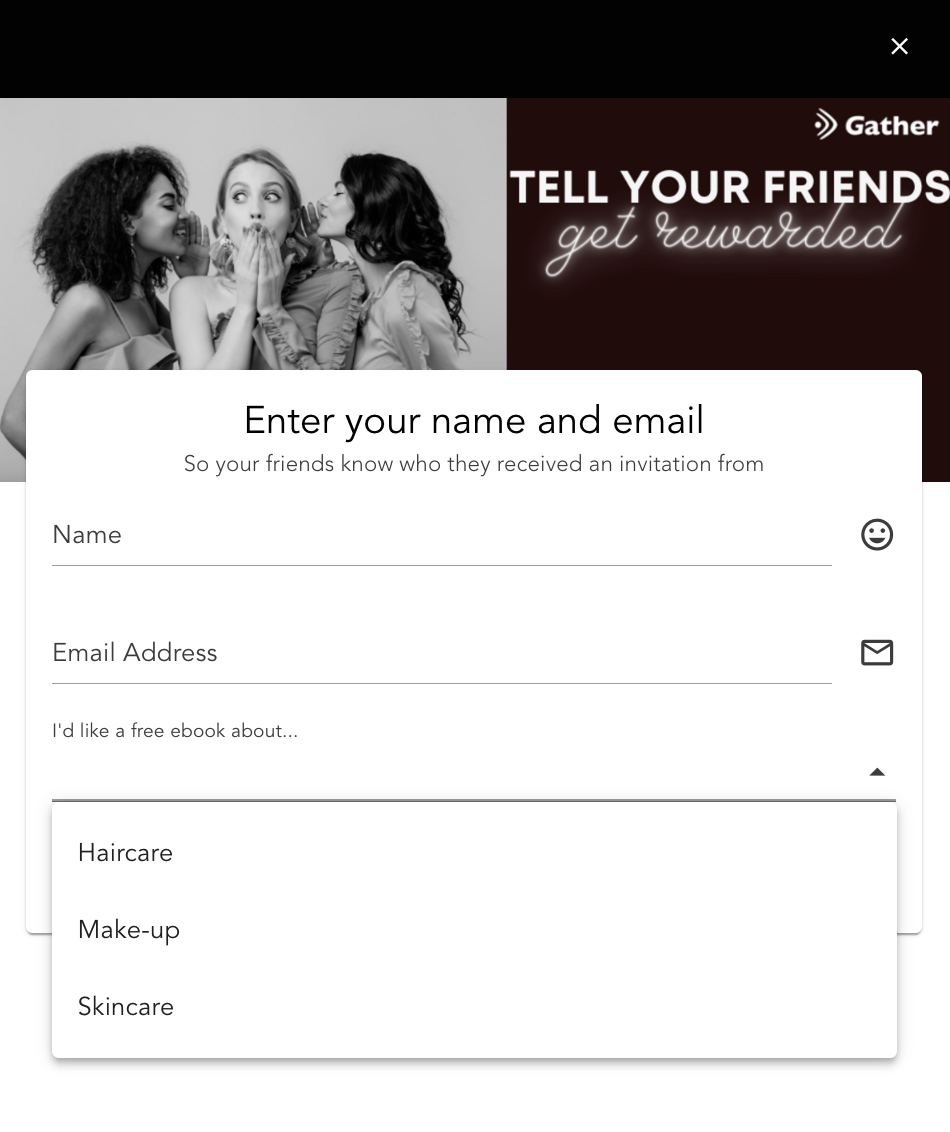
In this example, we are a beauty website, running a lead-generation referral campaign, and have asked leads to tell what they would like for information about: Hair, Make-up or Skincare.
To offer additional value to our customers in return for signing up we will send them a free ebook based on their preference on signing up.
We will include the select data field in the Opt-in Form Editor of our campaign.

When an advocate signs up they will be required to select a preference. This information is stored in their lead profile within Gather.

We can now use the custom information as liquid variables inside the retargeting/autoresponder email template to tailor the messaging and link served to our lead when they complete their sign up.
Inserting Liquid Variables in the Gather Email Editor
To use the select data in your email messaging head to your email editor. Ensure you are using the new email editor as shown below.

To use your select data, you will need to insert a piece of code to insert the liquid variables into your email message template, in addition to the merge tags already available.
Here is a copy of the code we have used:
{% if {{variable_select_data}} "{"0" ==> "Haircare"}" %}
Click here to download your free Haircare ebook.
{% elsif {{variable_select_data}} "{"0" ==> "Make-up"}" %}
Click here to download your free Make-up ebook.
{% elsif {{variable_select_data}} "{"0" ==> "Skincare"}" %}
Click here to download your free Skincare ebook.
{% endif %}
We have used an ‘if’ statement to print to the text to the email depending on the variable attached to the lead. You can also see that we have inserted a link to the text that will allow the lead to access the ebook.
Syntax is key when using liquid variables. Be sure to open and close the code with {% %} and encase the variable name with ““.
Results
It is important that you test your emails to ensure that you have got the correct syntax and no typos. Here is a copy of our sign up form:
In the above the lead has selected information about ‘Haircare’. Here’s the email they received:

Let us know know if you have any questions about liquid variables. Liquid variables is a great way of personalising your messaging with customers!