How to Edit your Referral Experience Interface
Here at Gather we give you the ability to edit the text that appears in the referral interface on your website.
In this article we show you how to further personalise your referral campaign.
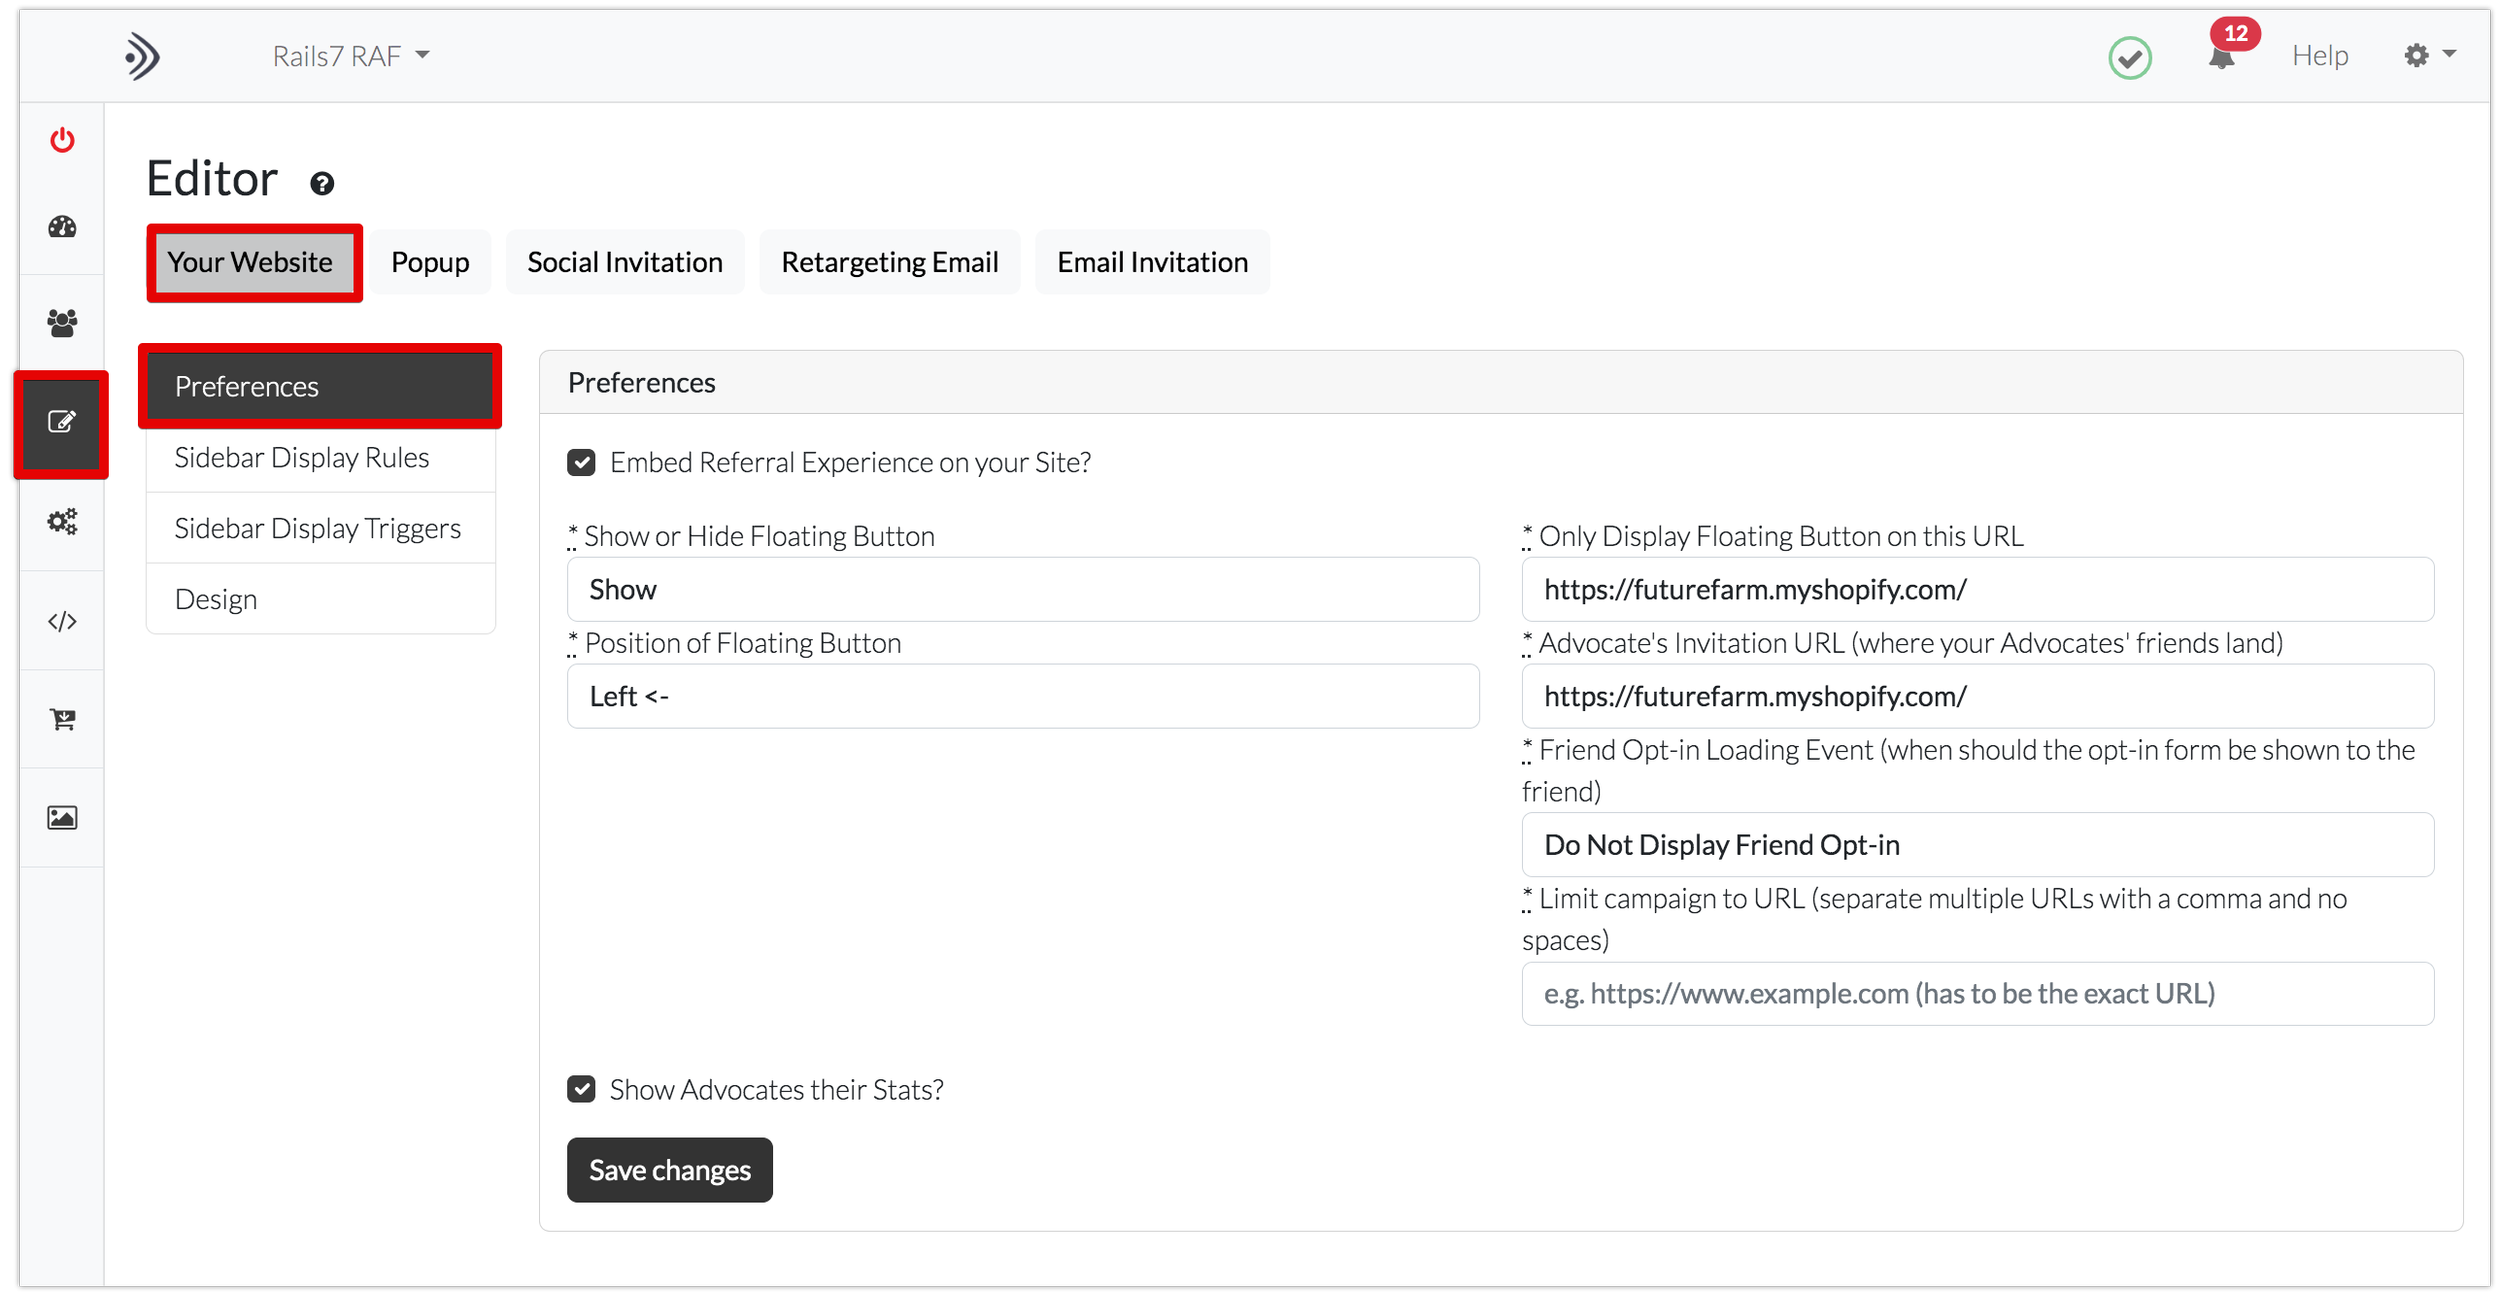
To access the editor, head to the Editor section of your Gather account and select the ‘Your Website’ tab.
Make sure you have selected to ‘Embed your Referral Experience’ on your site, by checking the box and saving changes. This is under the heading of ‘Preferences’.
For more information on the Display Preferences check out the following article. You can now set rules and triggers for when and where you want your referral sidebar to be displayed.
In this article we are going to run through the ‘Design’ Editor. We will examine the following features and how you can edit their appearance on your website.
Launch Button
Advocate Banner Image
Advocate Opt-in
Stats
Invitation Options
Rewards
Email invitation
Social Invitation
Messaging Invitation
Friend Banner Image
Friend Opt-in
Friend Opt-in Confirmation
Blocked Referral Message
Double Opt-in Text
Text Copy Shown to a Friend
Each of the above headings has a drop down arrow. By clicking on this you can see your options and also a preview appears on the left hand side of the Display Editor box.

Launch Button
The Launch button refers to the button that appears on your site either on the bottom left or right hand side. To chose it’s position head to the Display Preferences box at the top of the page.

The default text here is “Refer a Friend”. This section allows you to change the text that is displayed on the button on your site.

In addition you can also include a close button if you want to users to hide the button on your site. This can be useful on mobile where the screen space is smaller. Like the launch button you edit the background colour of the button and the icon.

Remember to click on Save changes for your edit to be saved.
2. Advocate Banner Image
You may or may not want to include a banner image in your referral campaign. If you are using the referral slider then an image can add branding to your campaign that is inline with the theme of your website. You can upload your banner images in the ‘branding’ section of your Gather account, read this article to find out how.
Here in the Editor, you can choose whether or not to include your uploaded advocate banner image, or not, by checking the box.

3. Advocate Opt-in
Advocate Opt-in refers to the box that advocates are shown when they enrol in your referral program. There are up to six sections you can edit:

A. Refers to the headline text and instructions to the advocate. In the display editor you can utilise the default text or amend to personalise the text to your campaign. When you change the text in the editor, the preview box on the left will update.

B. Refers to the help text within the name field. You can instruct advocates to enter their name in the format you require. If you make changes to this text the changes will appear in the preview box on the left hand side.

C. Refers to the help text in the email field.

D. Gather gives you the option to ask advocates to provide their phone number on sign up. You have the option here to make this an optional or required field. Alternatively, you can hide this field altogether.

E. Does your campaign require advocates to make a selection on sign up? For example, are you giving away a free sample or product of their choice? Gather gives you the option to include a selection field on sign up. Using the drop down menu you can turn on this field, make it optional or required and tailor the text to your campaign.

The data key is the name under which the information collected is stored in your Gather account area. For example, to see the information collected, navigate to the advocate section of your account. Click on details and you will see the data key and the information under it for each advocate.


Where you require advocates to make a selection from multiple options, select the condition ‘Multiple’ and enter the option names below. Remember to seperate each option with a comma.

Remember to click on Save when you are finished editing.
4. Stats
Where you have opted to show your advocates their referral statistics in the display preferences box you can change the text displayed to your advocates under this section.
The following image shows you the text you can change.

As always, remember to save changes made.
5. Invitation Options
This section allows you to edit the text displayed to advocates when they make referrals to their friends. The First heading is Text and refers to the heading of the box displayed to the advocates. Here you can change the Headline and subheading on the box.
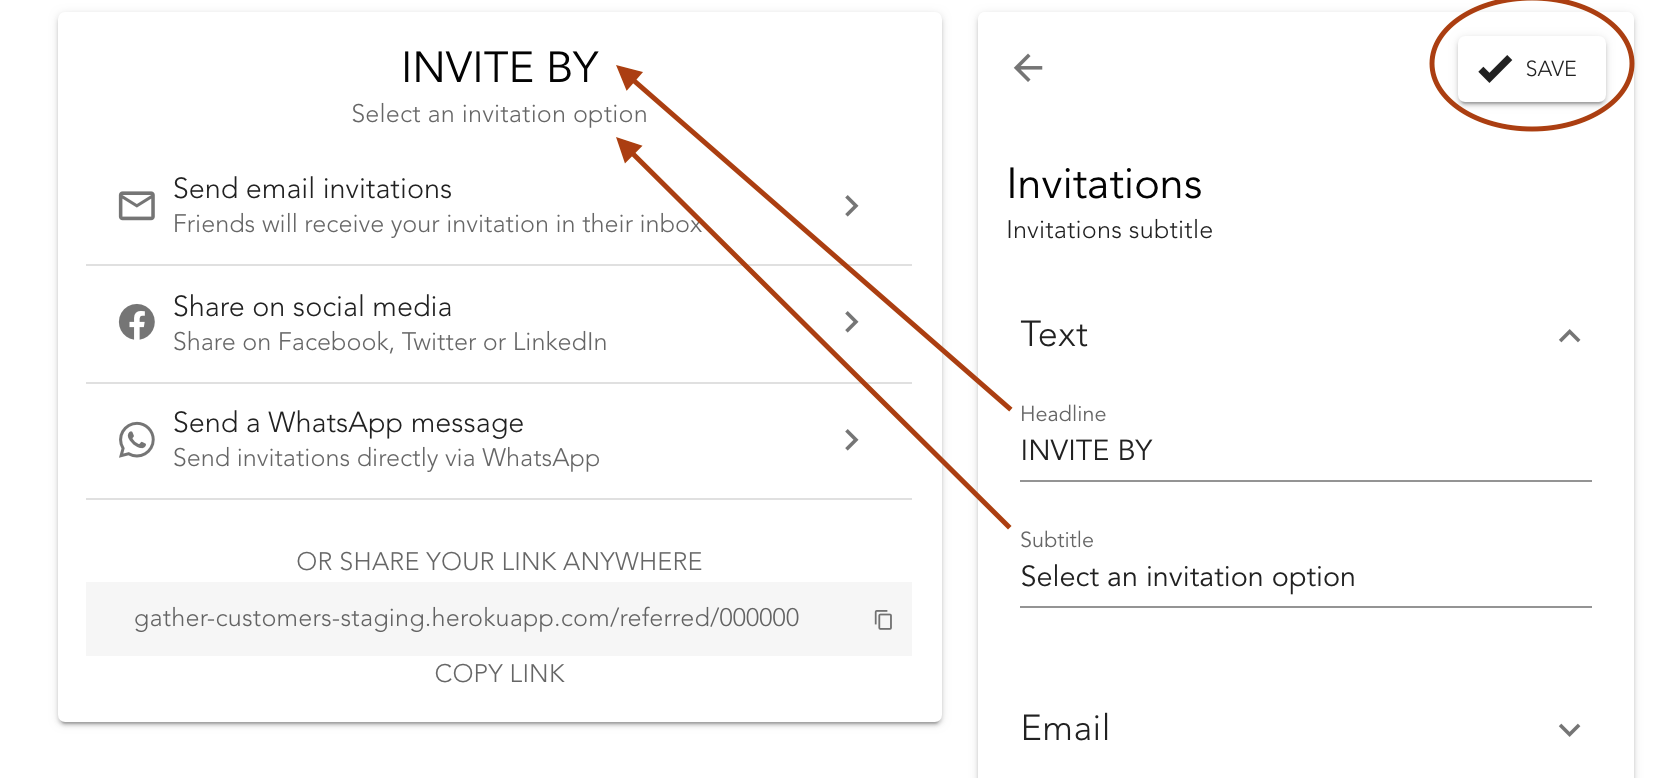
Gather allows your advocates 4 different channels through which they can refer their friends. For each of the following channels you can edit the text the advocates are shown on your site.

SOCIAL MEDIA

WHATS APP

LINK

Remember to click on the save button for each heading you edit.
6. Rewards
If you are rewarding your advocates, for their referrals, you can edit the heading and subheading of the box which shows advocates their progress.
To edit your rewards and reward tiers, please go to the Rewards section of the editor at the top of the page or refer to the following article.

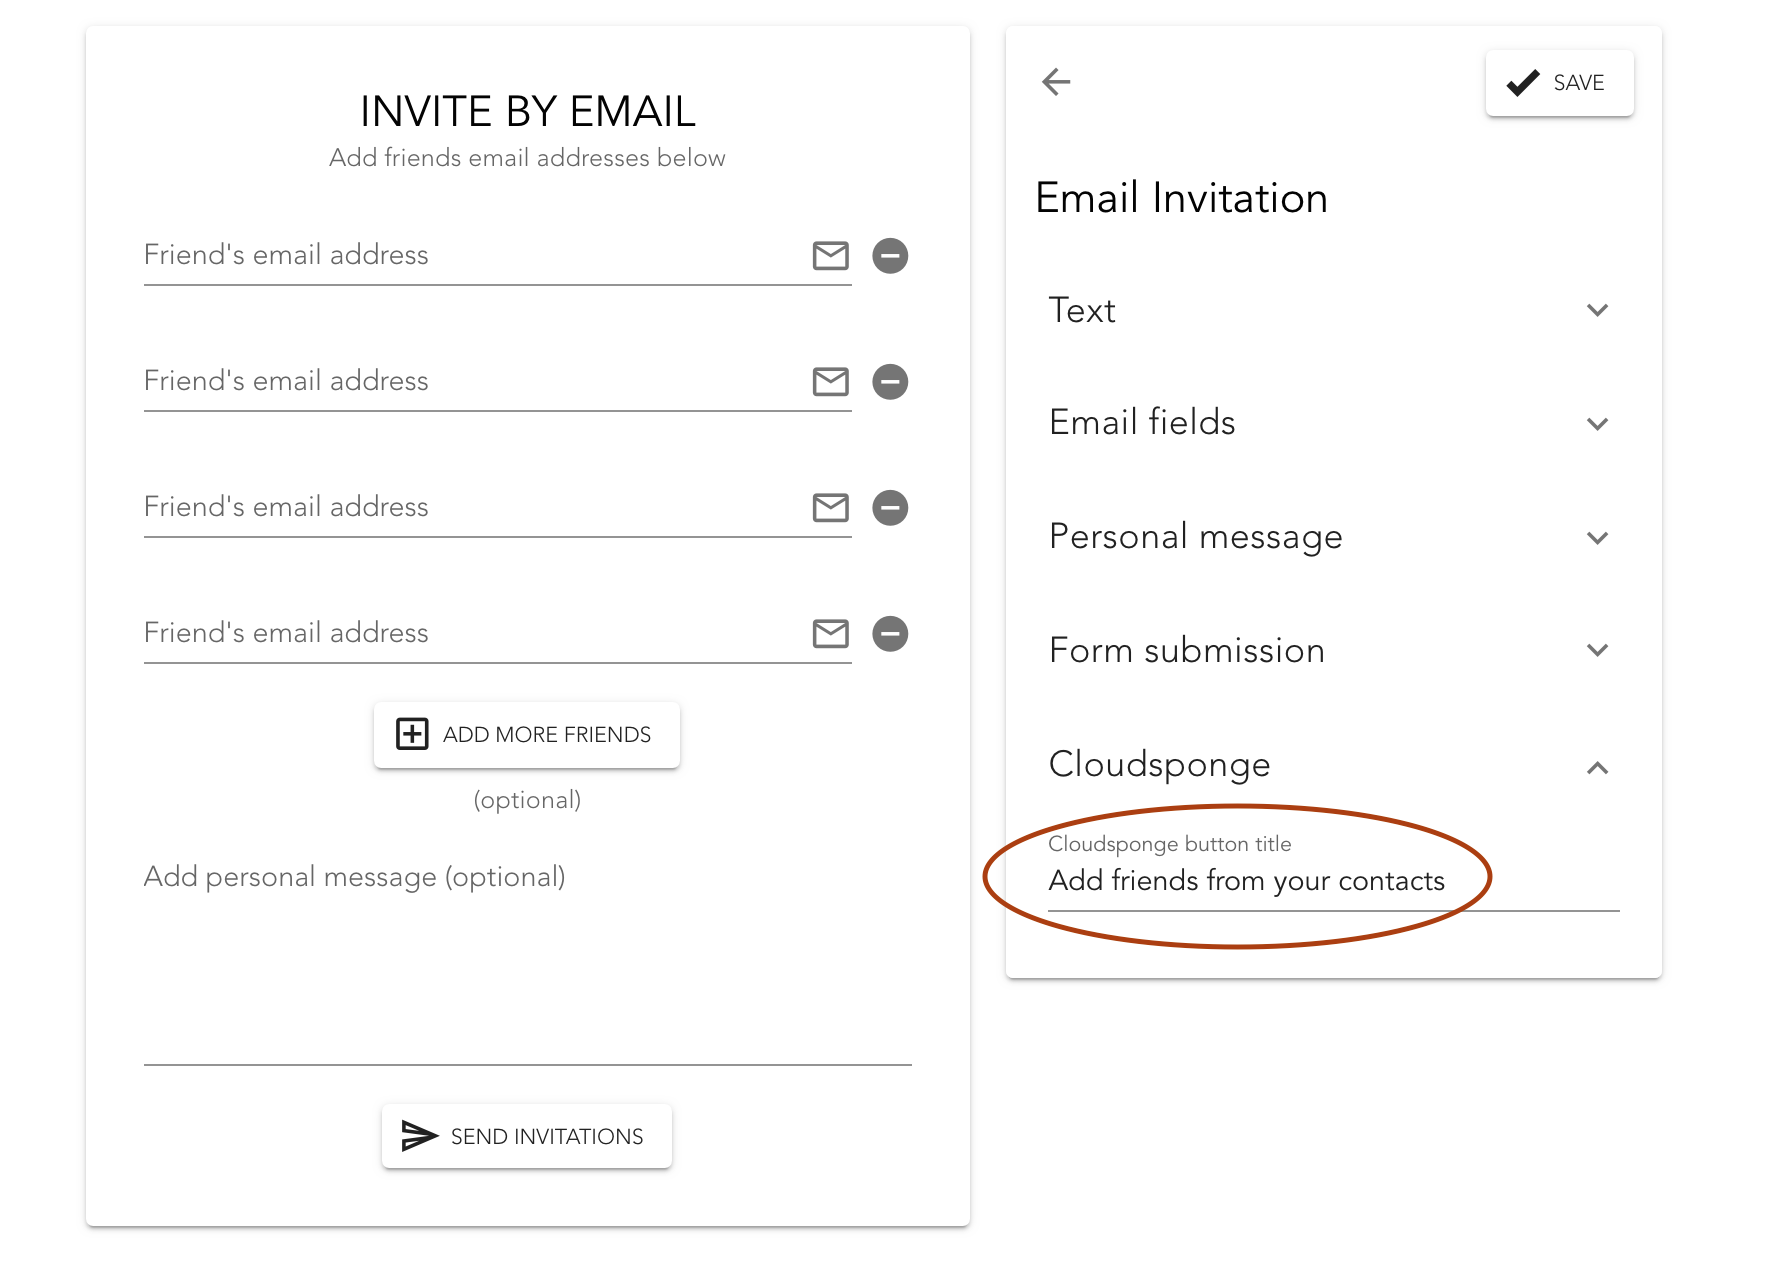
7. Email invitation
Where your advocates have opted to invite their friends by email, here you can edit the text in the invitation screen.

The first option is the titles displayed in the box. This is the TEXT drop down menu.

The next menu you can edit is the text displayed in the email fields.

The headings you edit here depend on whether you have selected to send the email on your customer’s behalf or not in the preferences section.
Where you are sending emails on behalf of your customers, see the following article for more information.
Where your customers are sending emails to their friends with their own email client see the following article for more information.
The next menu you can edit is the Personal Message text. This is where you allow your advocates to add a personal message to the email sent to their friends.

This is followed by the Form Submission options.

Finally under this section, if you have linked your account with CloudSponge then you can change the text that is displayed on the CloudSponge button.
Click on the link to find out how to integrate your account with CloudSponge.
Remember if you have made changes here to click on the save button.
8. Social Invitation
Under this section you can edit the text that your advocates will see when they are making referrals using Social Media.

Remember to click on save.
9. Messaging Invitation
This refers to the text displayed to advocates when they are making a referral via Whatsapp.

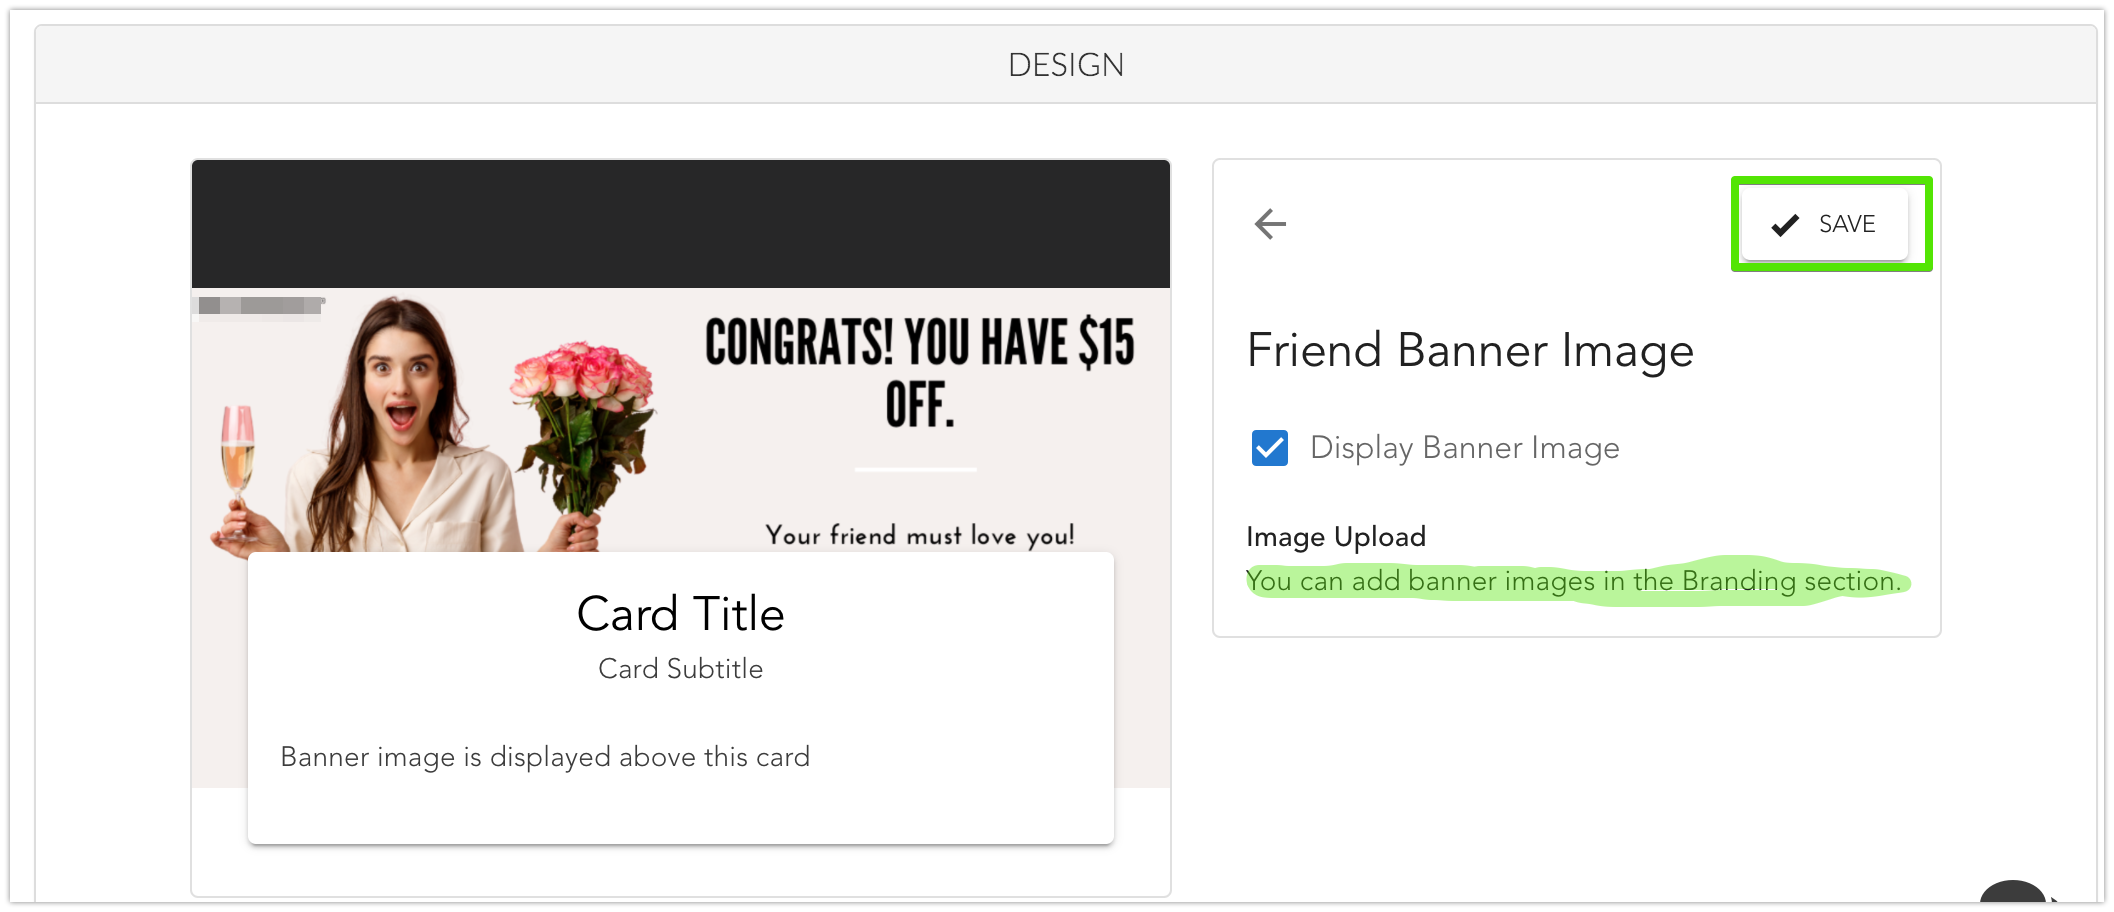
10. Friend Banner Image
Just like with the Advocate banner image (see step 2 above) you can choose to include a banner in your referral campaign which is displayed to the referred friend. To upload your image navigate to the branding section.
To display your uploaded image, or not, check the box accordingly.
11. Friend Opt-in
This is the form that the friend will see when they click through to join. It is set up in the same way as the advocate opt-in above at point 2.

A. Refers to the headline text and instructions to the friend. In the display editor you can utilise the default text or amend to personalise the text to your campaign. When you change the text in the editor, the preview box on the left will update.
B. Refers to the help text within the name field. You can instruct friends to enter their name in the format you require. If you make changes to this text the changes will appear in the preview box on the left hand side.
C. Refers to the help text in the email field.
D. Gather gives you the option to ask friends to provide their phone number on sign up. You have the option here to make this an optional or required field. Alternatively, you can hide this field altogether.
E. Does your campaign require friends to make a selection on sign up? For example, are you giving away a free sample or product of their choice? Gather gives you the option to include a selection field on sign up. Using the drop down menu you can turn on this field, make it optional or required and tailor the text to your campaign. Look back on section 2 of this article for more guidance on using a selection field.
F. Refers to the text for the submit button.
G. Errors refers to what will be displayed to the friends if there is a problem with the information provided in the form.
H. Gather allows you to change the consent options for a friend who is signing up to a campaign. For a Customer referral program, where a friend is required to make a purchase, the default option is to display a consent box on sign up to the campaign. For a lead generation campaign the default is to opt-in on sign up. We recommend that when a friend is being opted-in on submission of the form, you include text in the box to communicate this to the user. This can be included in the Title headings. An example of this is given below.


Where the friend is being opted-in on submission of the form (no checkbox included) we recommend you include text here to communicate this to the user.
When a friend receives an email invitation from an advocate to join the campaign, they are automatically subscribed to receive email marketing. If you want to give friends the opportunity to opt-in, refer to the following article to change the setting of your email invitation.
As always, remember to save changes you have made in this section.
12. Friend Opt-in Confirmation
This section refers to the box the friends will see when they have submitted their details and joined your program. Here you can change the headline text under the TEXT setting and the text relating to the reward codes provided.


If you have chosen to reward your advocates with link in under the Rewards section then you can change the copy of the link provided under the heading of Copy Link Text.


13. Blocked Referral Message
Where you have enabled Referral Fraud Detection, in the Preferences section, and a suspicious email is detected by Gather the friend will shown a message showing that their submission is pending. You are able to change the message the friend is shown here. To see pending referrals and approve go to the Advocate section.

14. Double Opt-in Text
This applies to those running a lead-based or subscriber based referral program.
If, in the preferences section under fraud detection, you have selected for double opt-in, then this is the message your advocates will be shown asking them to confirm their email address.


15. Text Copy Shown to a Friend
Once a friend has completed the opt-in process they are are shown a message which you can edit here.
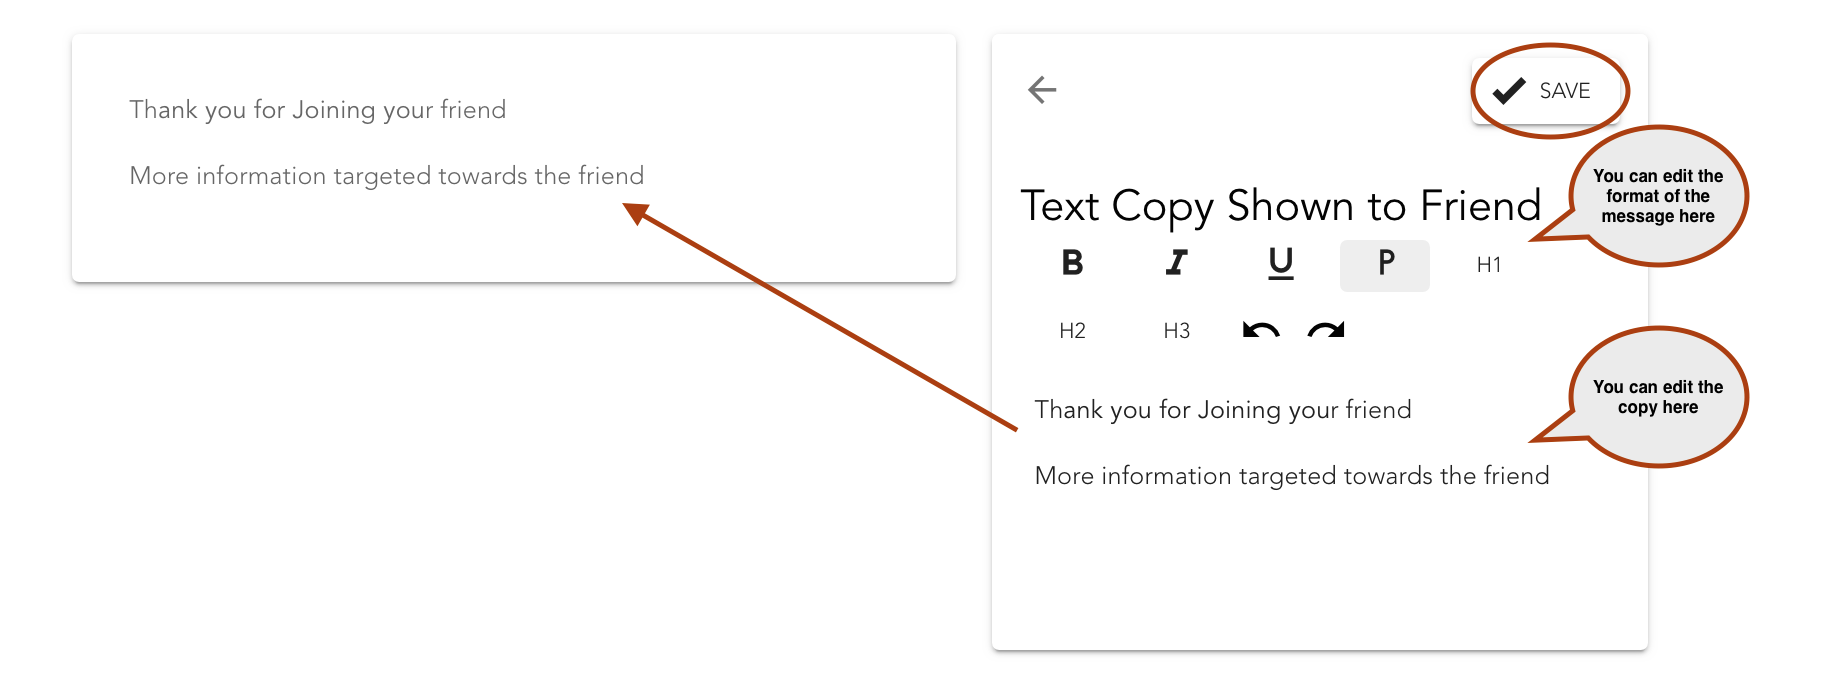
Here we recommend that you include a message that is targeted to the friends telling why they have made the correct choose in joining your brand.
As always, make sure you save all changes you make before navigating away from the page. Please note that if you are making changes, to an active campaign, it may take a few minutes for them to appear on your site as they are processed by Gather.
If you need any extra help, send us an email at hello@gathercustomers.com or check out our help articles here at Academy.