Use Gather’s Email Editor to Personalise your Opt-in Follow up Email
Find out how to personalise the opt-in follow up email that is sent out to new leads through your opt-in campaign
In this article, we will show you how you can create a personalised opt-in follow up email, using Gather’s email editor tool, to design the email that is sent out to leads on signing up.
An opt-in follow up (formally ‘autoresponder’) email is a great way to reach out to newly opted in persons with a thank you message. If you have given a reward out as part of signing up, this email provides a perfect opportunity to remind them of the reward code and the benefits of joining.
The opt-in follow up email is now located in the Website sidebar section of the Editor.

When using the opt-in follow up email, as well as editing the email (as below) you can choose the subject line, and set a time delay for when the email is sent out. You can also deactivate/activate the email from within the editor.

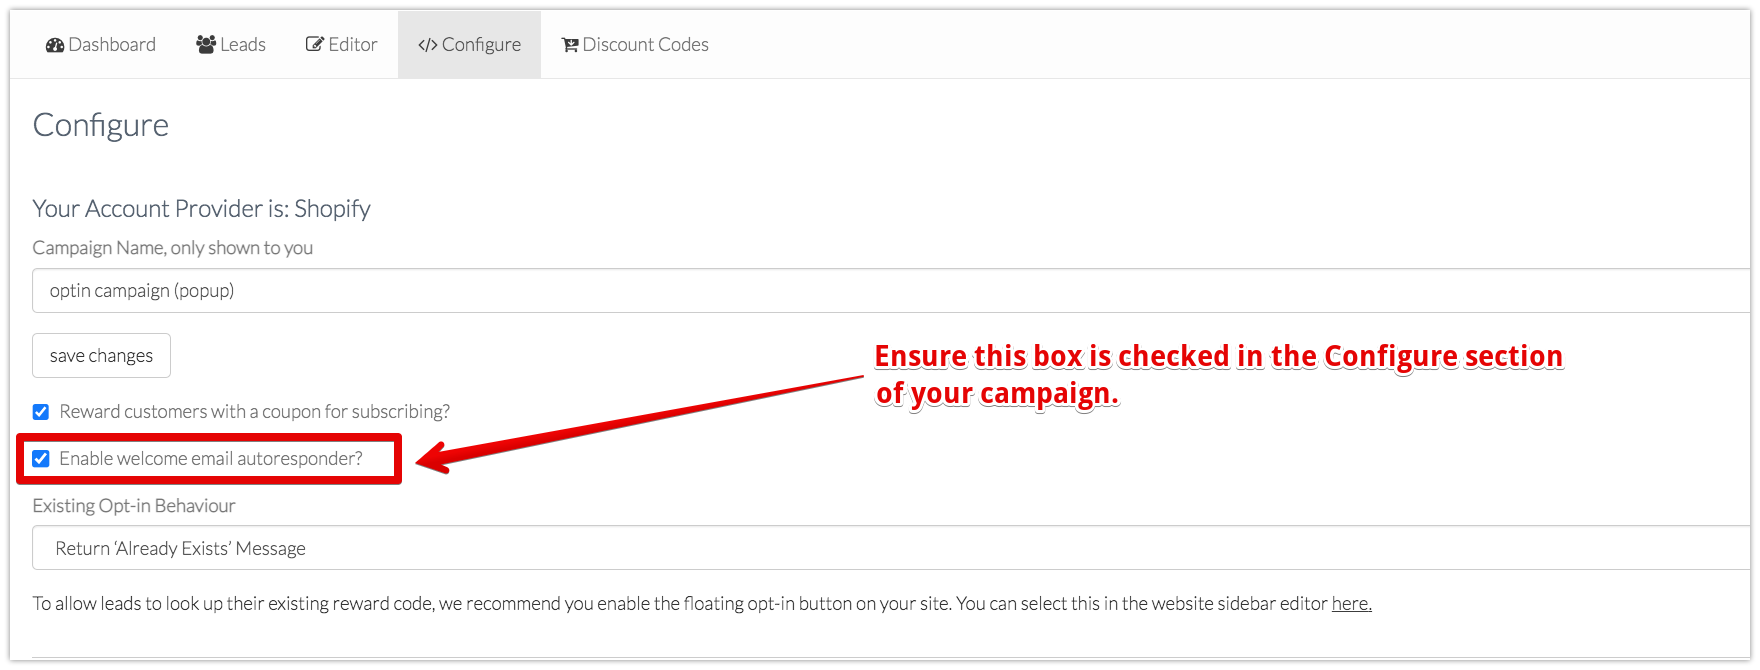
* For existing account holders, ensure that you have the autoresponder email enabled in the Configure section of your campaign.
The opt-in Follow up email editor is found in the Editor section of your campaign.
* If you are an existing account holder and haven’t already switched to the new email editor complete the following steps:


Gather’s email editor allows to you fully customise the email. The layout, images, text and merge tags used in the template can all be modified simply by clicking in the box to edit the contents. You can also add or remove boxes.
You can also include liquid variables to print custom information based on information collected from leads at sign-up.
1. Subject line
The subject line is what your customer will see when the email appears in their browser. To edit the subject line simply click in the subject line box and enter your preferred text.

2. Email Body
Gather’s email editor allows you to insert your own images in the email. Simply click on the card you where you want to include the image and use the editor on the right hand side to upload or link to the image you want to insert. Once uploaded the image will appear in the preview window on the left.

You can easily update the text, using the text editor as shown below. There are additional editing options on the right.
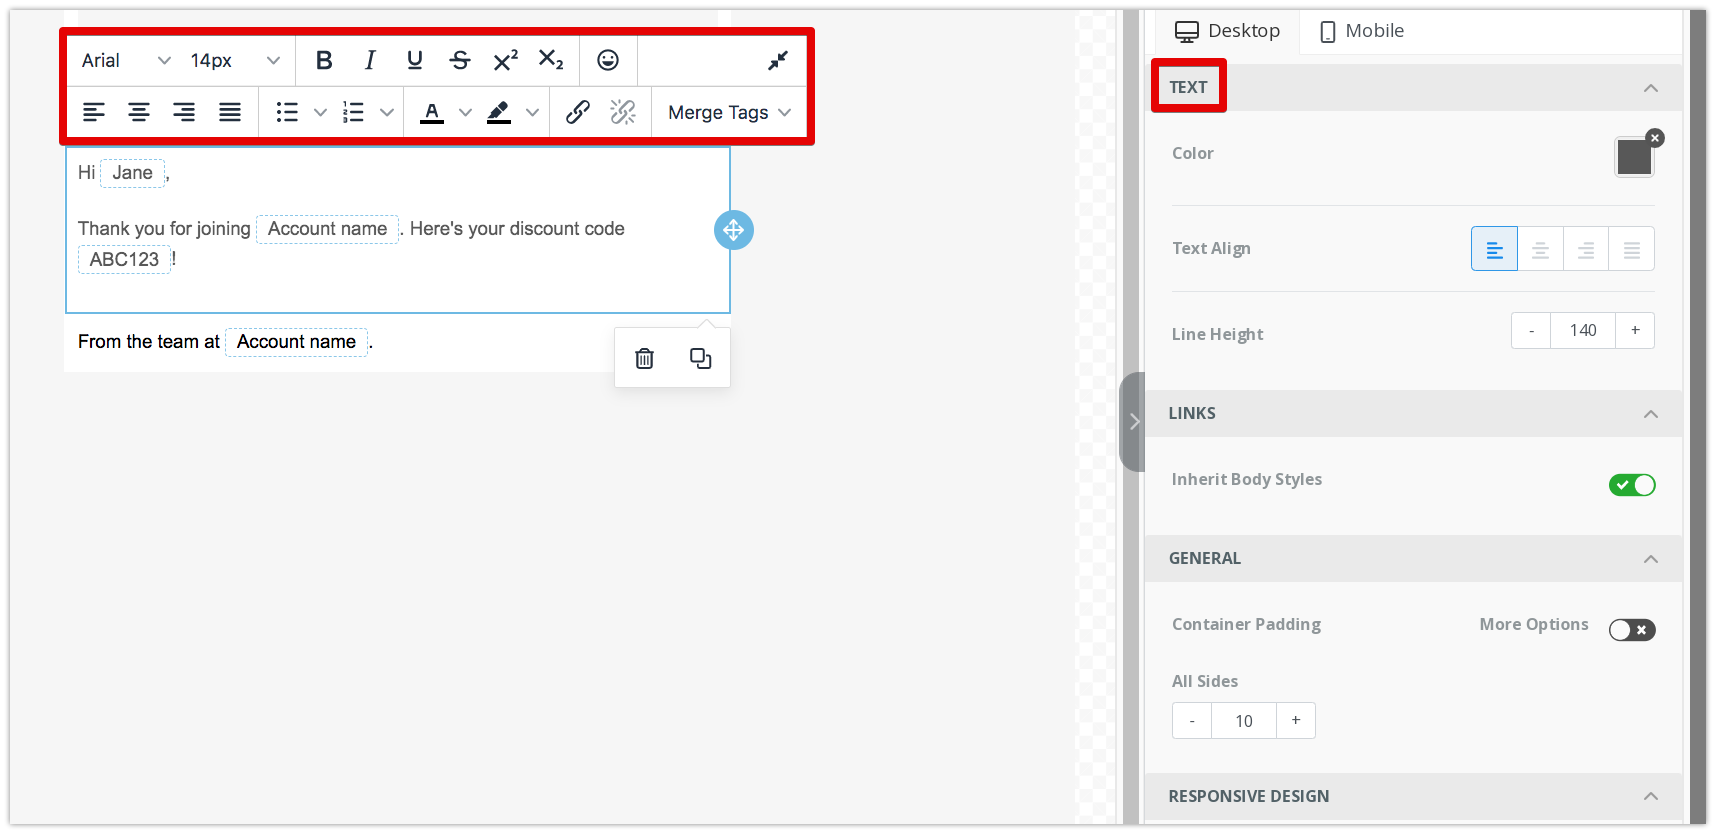
3. Merge tags
Gather uses merge tags to make your emails more personal. The default email includes your lead's first name and the confirmation page URL.
You also have the option of including the following 2 merge tags;
Customer full name
Discount code
The process for inserting merge tags is simple. Click in the body of the message where you would like to insert a tag and then click on the tag you would like to insert.

Remember, to click on the SAVE CHANGES button to implement any changes you have made to the email.
Got any questions? Check out our help articles here at the academy or email us at hello@gathercustomers.com.