How to Design the Invitation Email, Sent by you on Behalf of your Advocate, using Gather’s New Email Editor
Gather, with its newly integrated email editor, provides you with the ability to customise the invitation emails you send out on behalf of your customers. Find out how you can customise your invitation emails in the following article.
In this article we cover the following topics:
Setting your email preferences
Using the Gather email editor
Setting your subject line
Including branding assets in your email
Customising the email body
Including merge tags in the body of your email
Editing the ‘Accept Invitation’ button.
So let’s get started!
Setting your Email Preferences
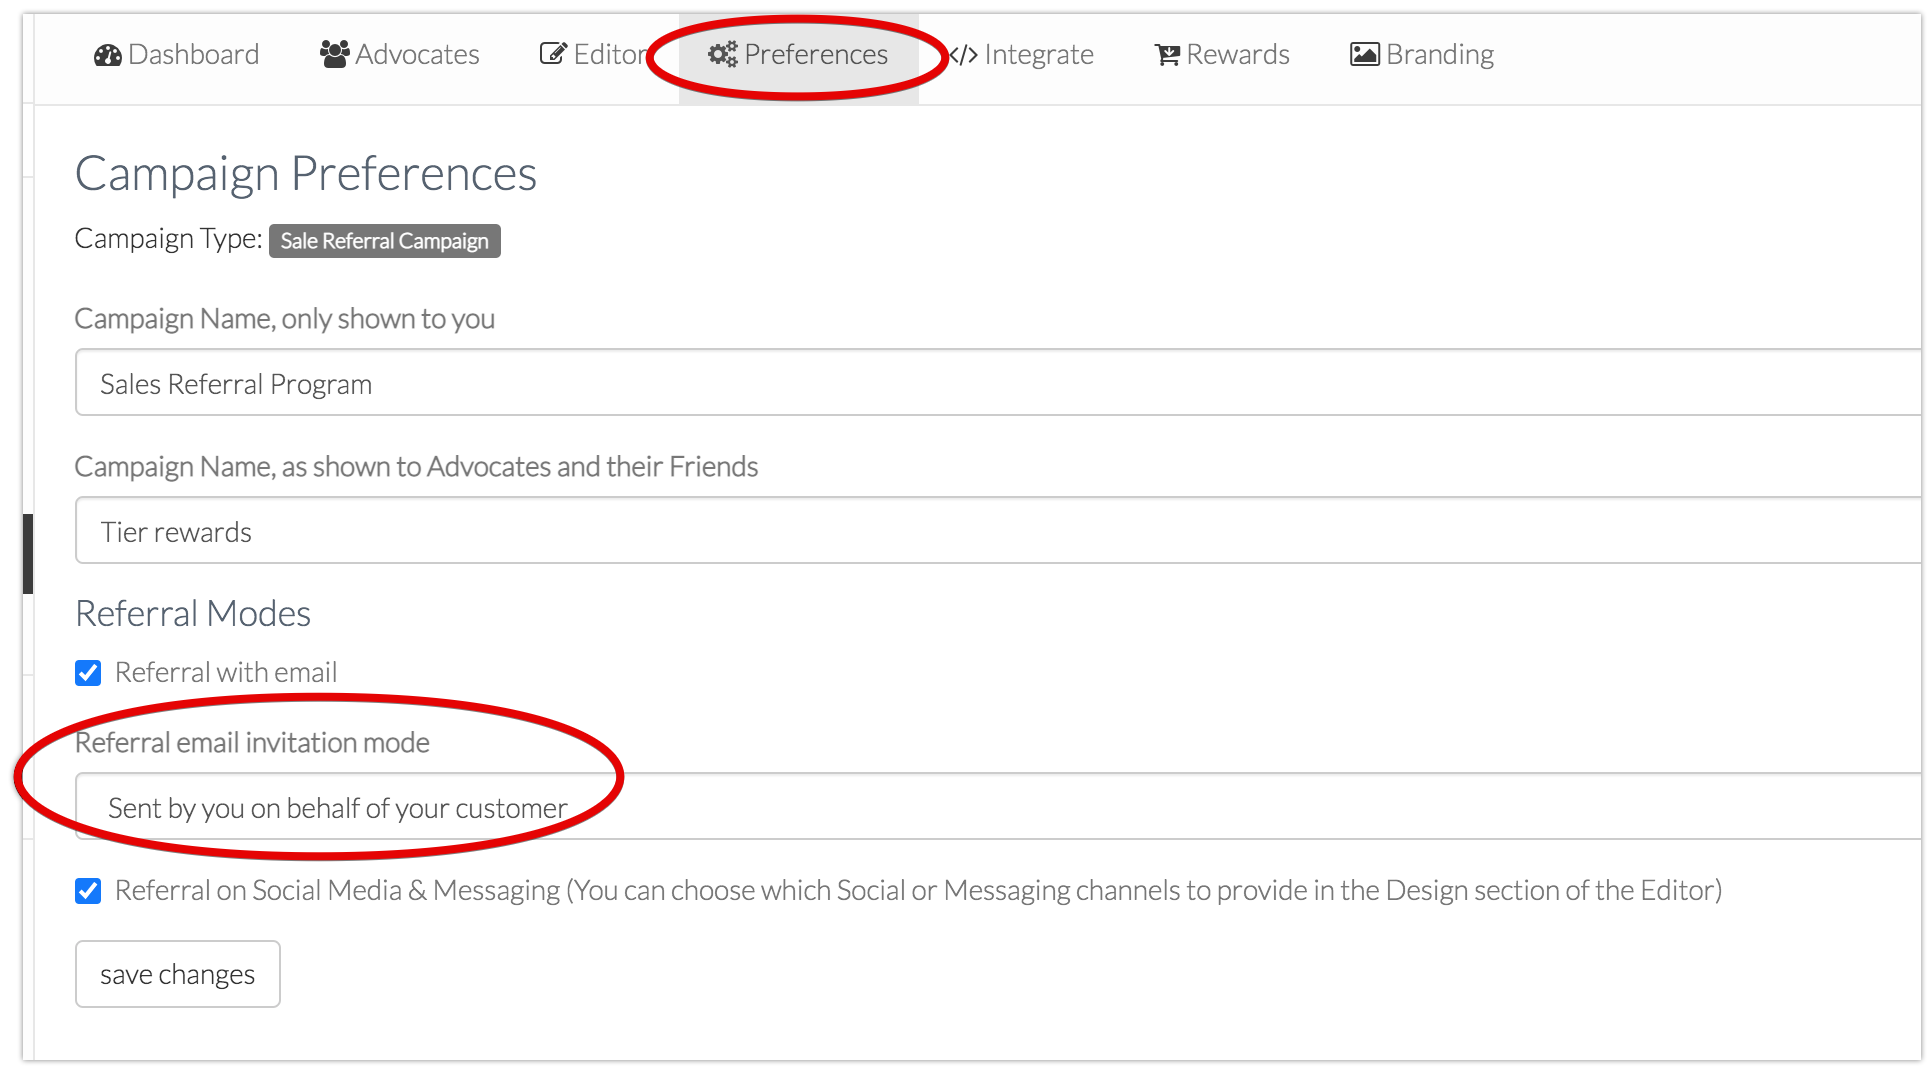
Within your Gather account preferences you can choose whether you want your customers to send the invitation to their friends using their own email provider or whether you would like to send the invitations, to your customer’s friends, on their behalf.
The Gather email editor is applicable to campaigns where you would like to send the invitation email to your customer’s friends on their behalf.
To send the invitations on your customer’s behalf, using the Gather email editor, navigate to the ‘Preferences’ section of your Gather account and save the referral mode from the menu, as shown in the image above.
2. Using the Gather Email Editor
Once you have saved the mode of referral as ‘Sent by you on behalf of your customer’ go to the ‘Editor’ section of your Gather account and select the ‘Email Invitation’ tab.
Please note that If you are an existing Gather account holder you will have the option to try the new email editor. If you would like to go back to the classic editor, you can revert back as shown in the image above.
3. Setting your Subject Line
First things first, let’s set the subject of the email. Included in the editor is default text, including a merge field for {{REFERRER_NAME}} being the name of the advocate on whose behalf you are sending the email.
Including this merge field helps make the email stand out in the friend’s inbox but you can choose whether or not to include this simply by over-writing the text.
Once you are satisfied with your subject line click on the ‘Update subject line’ button to save any changes.
Scrolling down the Editor page you will see how Gather’s email editor really comes into its own.
From the sidebar, on the right hand side, you can see that you have the ability to completely customise the design of the email you are sending on your customer’s behalf.
Gather includes a default email template to get you started, comprising 4 horizontal blocks being:
image
body
personal message
accept button
The email editor gives you full control of the layout and number of blocks you use, this can be changed using the sidebar.
4. Including Branding Assets in your Email
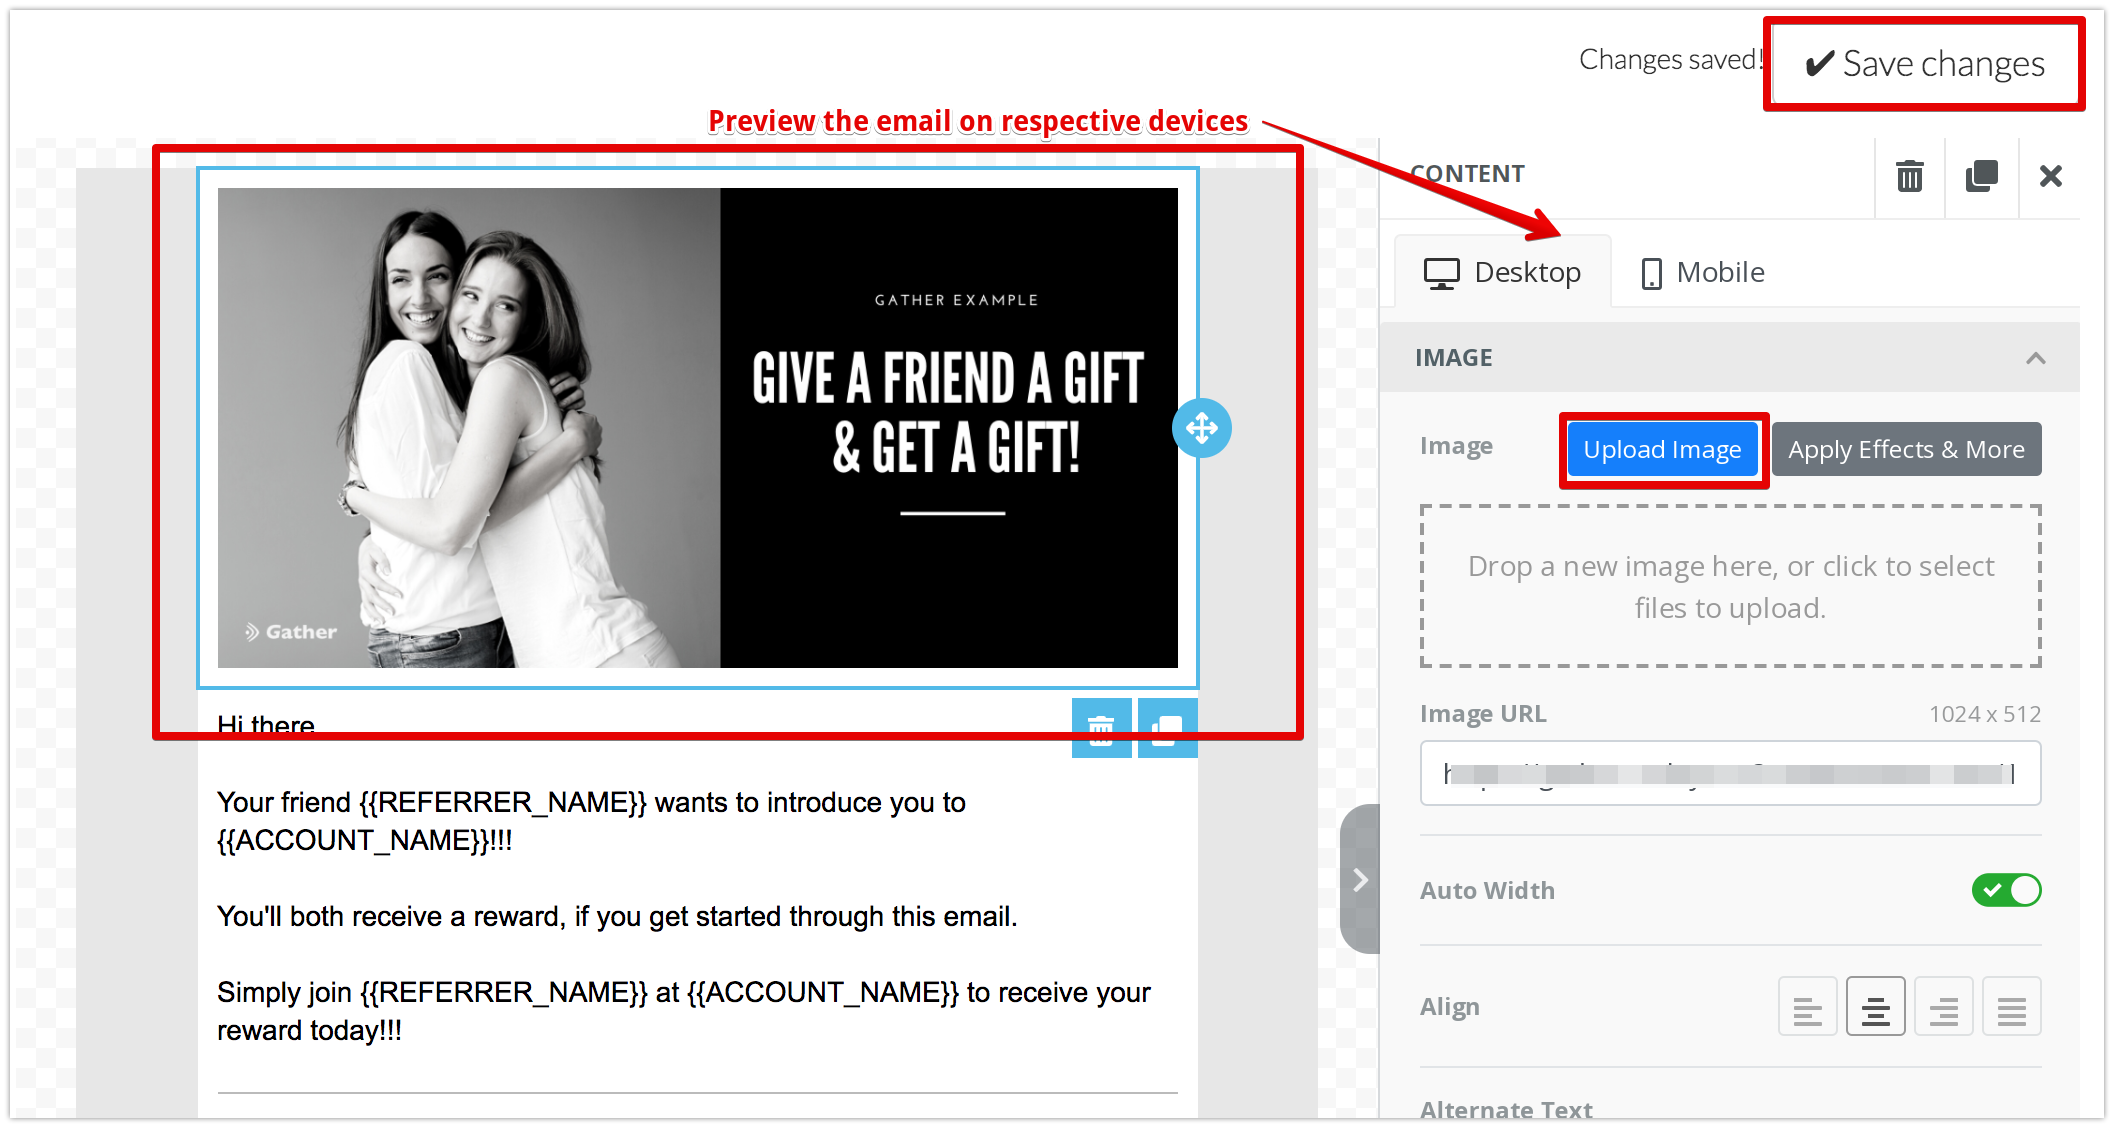
One of the most important things that Gather’s customers request is the inclusion of brand specific images (assets) within invitations emails. This is made easy by clicking on ‘images’ icon or image block on the preview pane.
The editor allows you to upload your images, apply effects and configure the layout of the email.
All of which is demonstrated to you, in real time, in the preview pane.
The editor also allows you to preview the email for different devices so you can see how the email will look on desktop compared to mobile.
Remember to click the ‘Save Changes’ button as you go!
5. Customising the Email Body
In the same way that you can customise your invitation email with your own branding assets you can customise the body of the email text using the text editor.
By clicking on the email text block the text editor tool bar will appear.
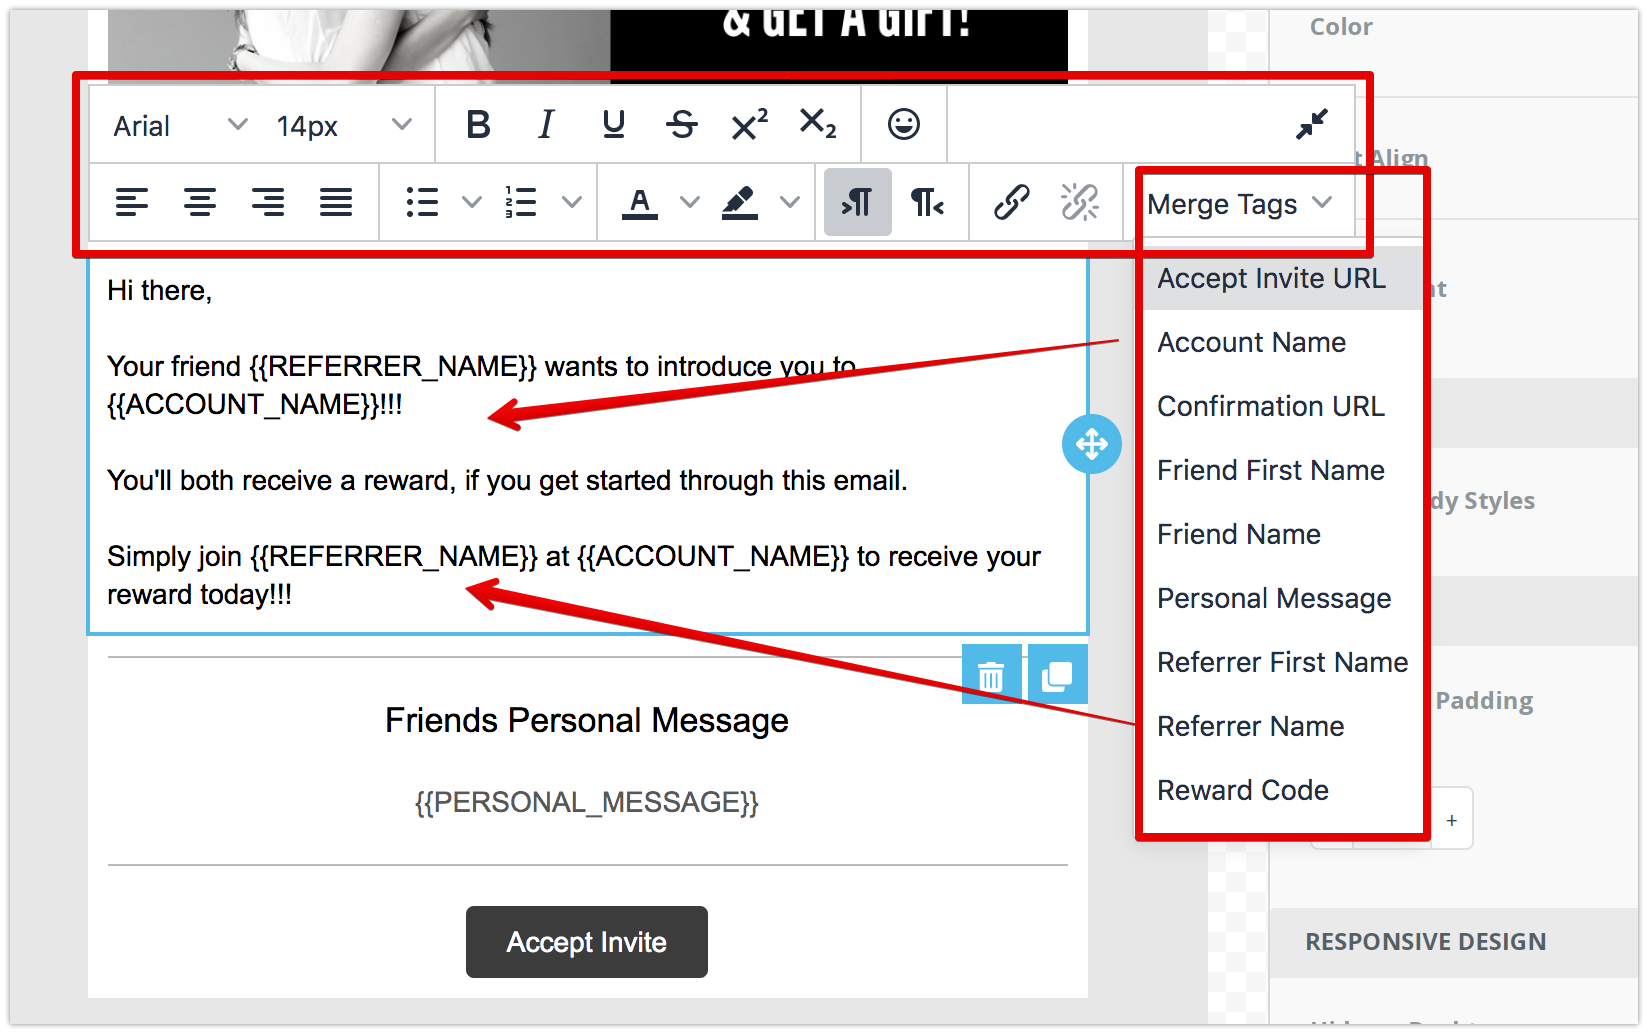
Using the text editor tool bar you can change the font, font size and layout of the mail message.
Remember to save changes by clicking on the green save changes button.
6. Including Merge Tags in the Body of your Email
Gather not only enables you to customise your invitation emails using the text editor but another standout feature for Gather is the ability to use merge tags within your emails to personalise the message you send out.
Within the text editor tool bar is a drop down menu of merge tags available to use in your emails.
To insert a merge tag in your email body click in the body of the email, where you would like to insert the tag, and then click on the tag you would like to insert from the drop down list.
The tag will appear within the message surrounded by double curly braces.
Merge tag information is pulled from the information provided by advocates who have signed up to your referral program.
For example when an advocate signs up, to a campaign through Gather, and selects to send invitations by email, they are given the option of including a personal message in the email to their friends. This is included in the third block of the email message. The merge tag {{PERSONAL_MESSAGE}} inserts this message in personal message block of the email.
7. Editing the ‘Accept Invitation’ Button
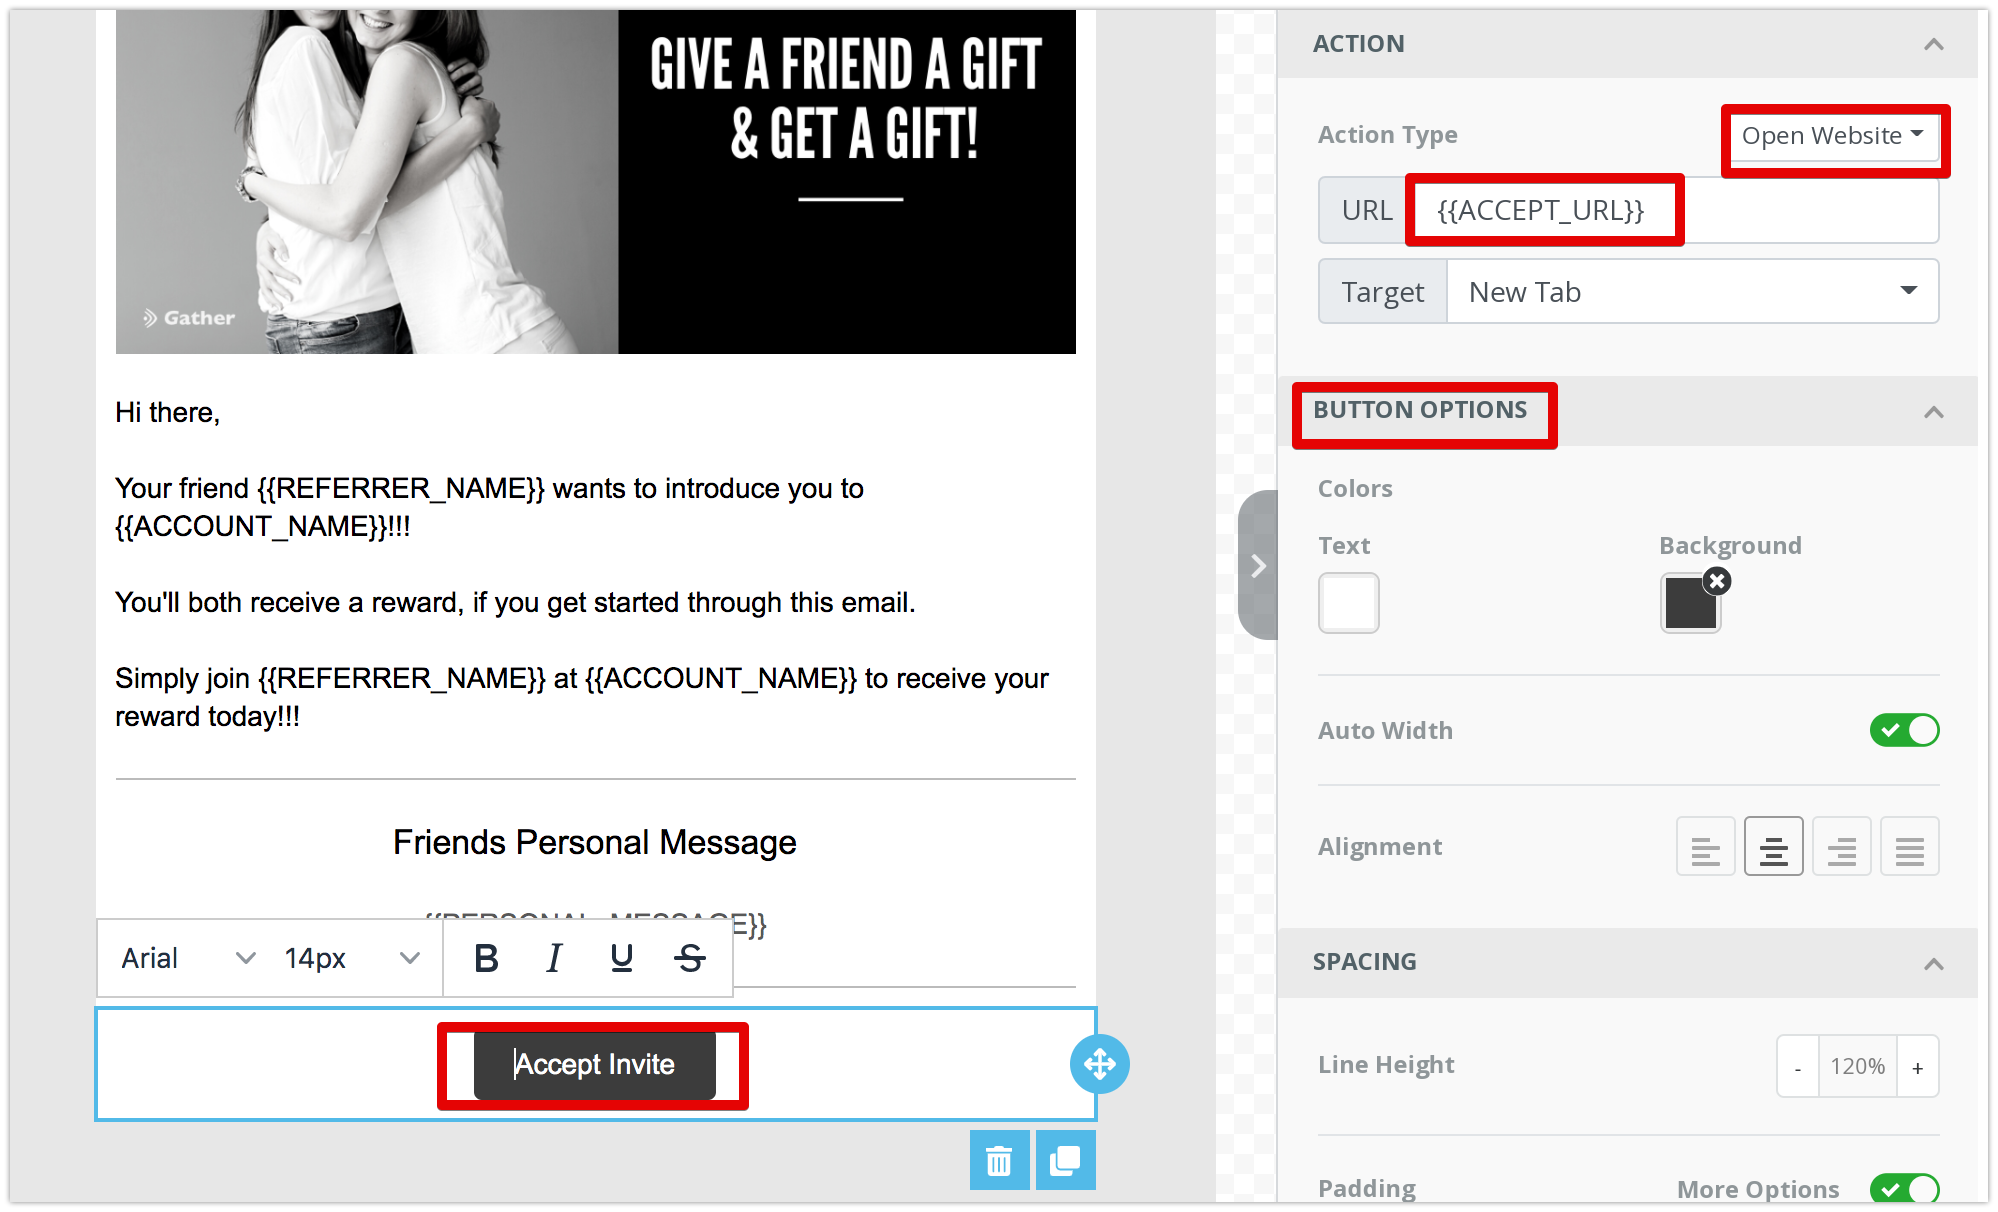
The forth block in the default email template is the ‘Accept Invitation’ button. By clicking on the block the editing tools will be displayed on the right hand side.
From the right hand side you can edit the button’s attributes such as the colour and spacing.
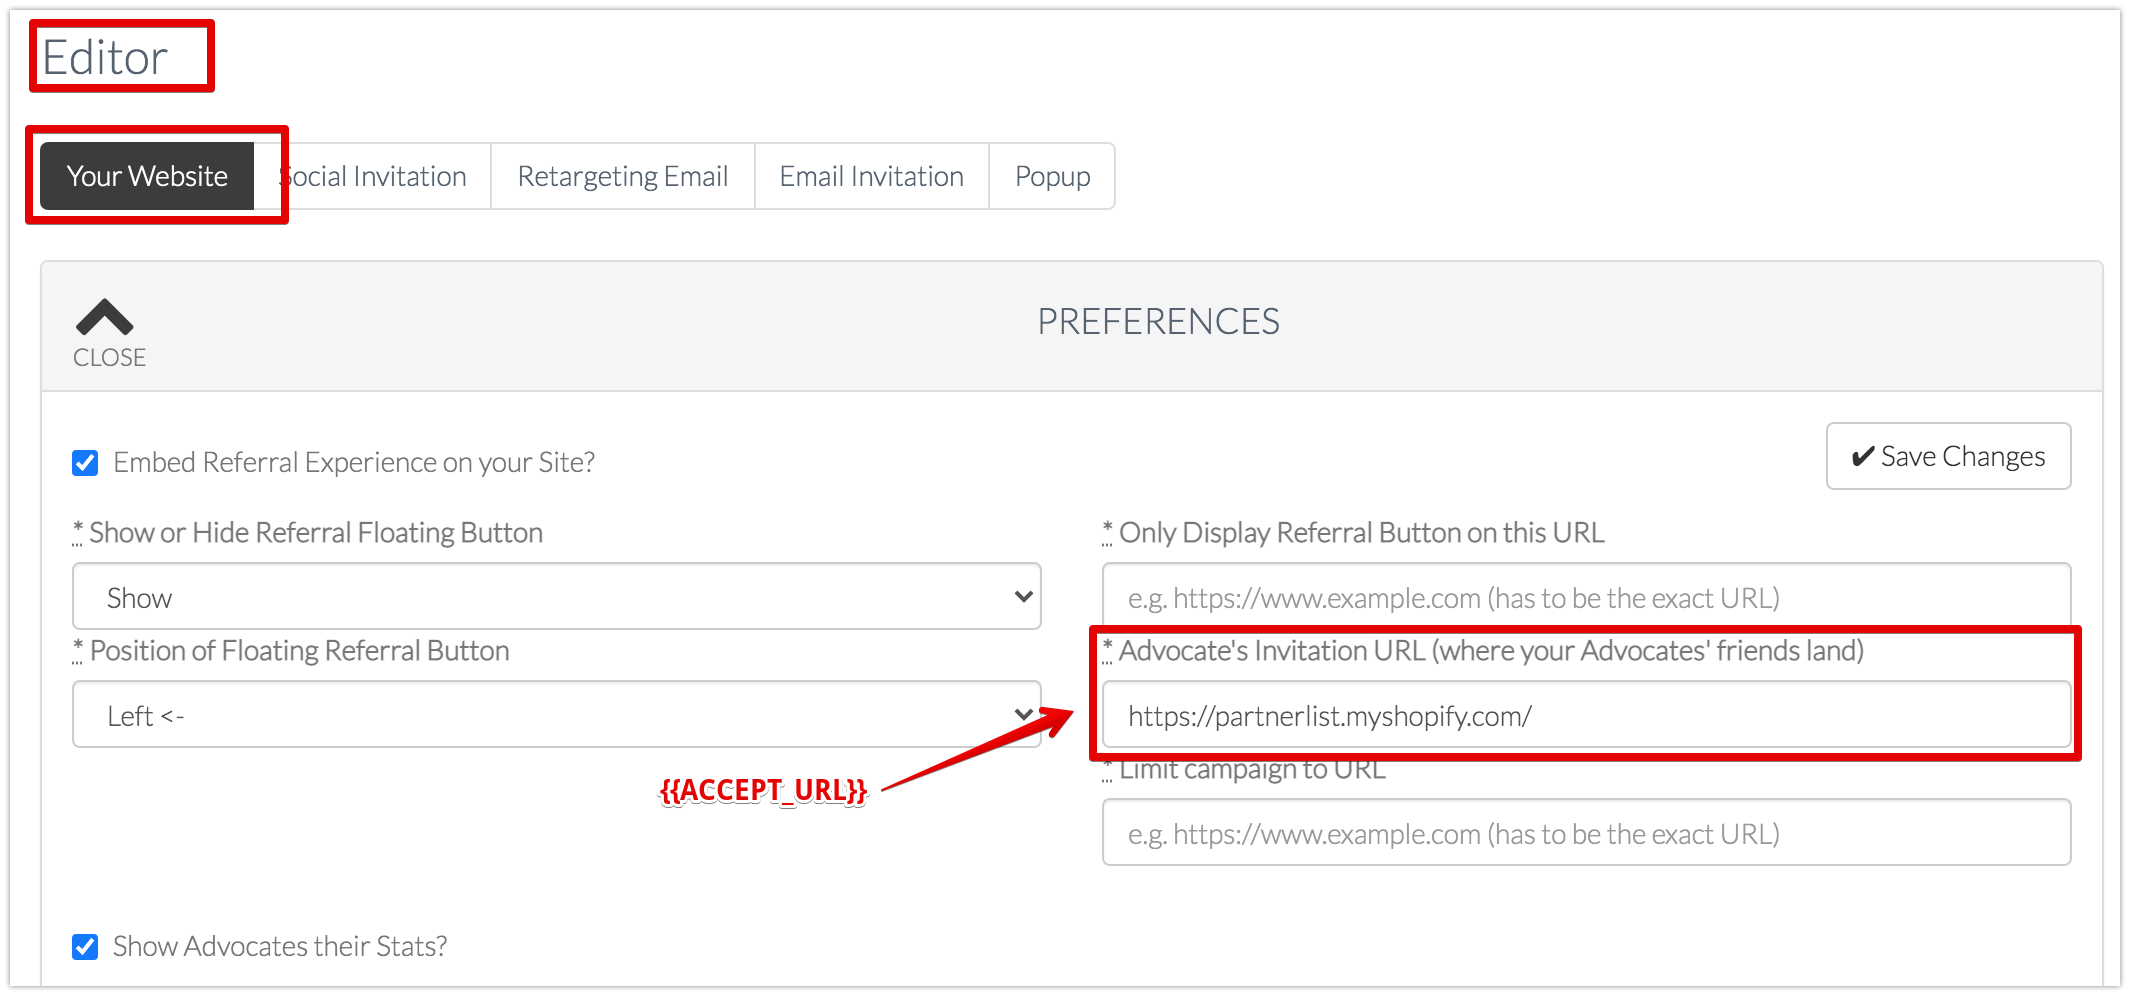
By default, clicking on the button, the friend will be redirected to the URL you specify in Editor > Your Website section, in the Advocate Invitation URL field. This is denoted by the {{ACCEPT_URL}} merge tag.
Below is a screenshot thats shows you where the accept URL address is pulled from.
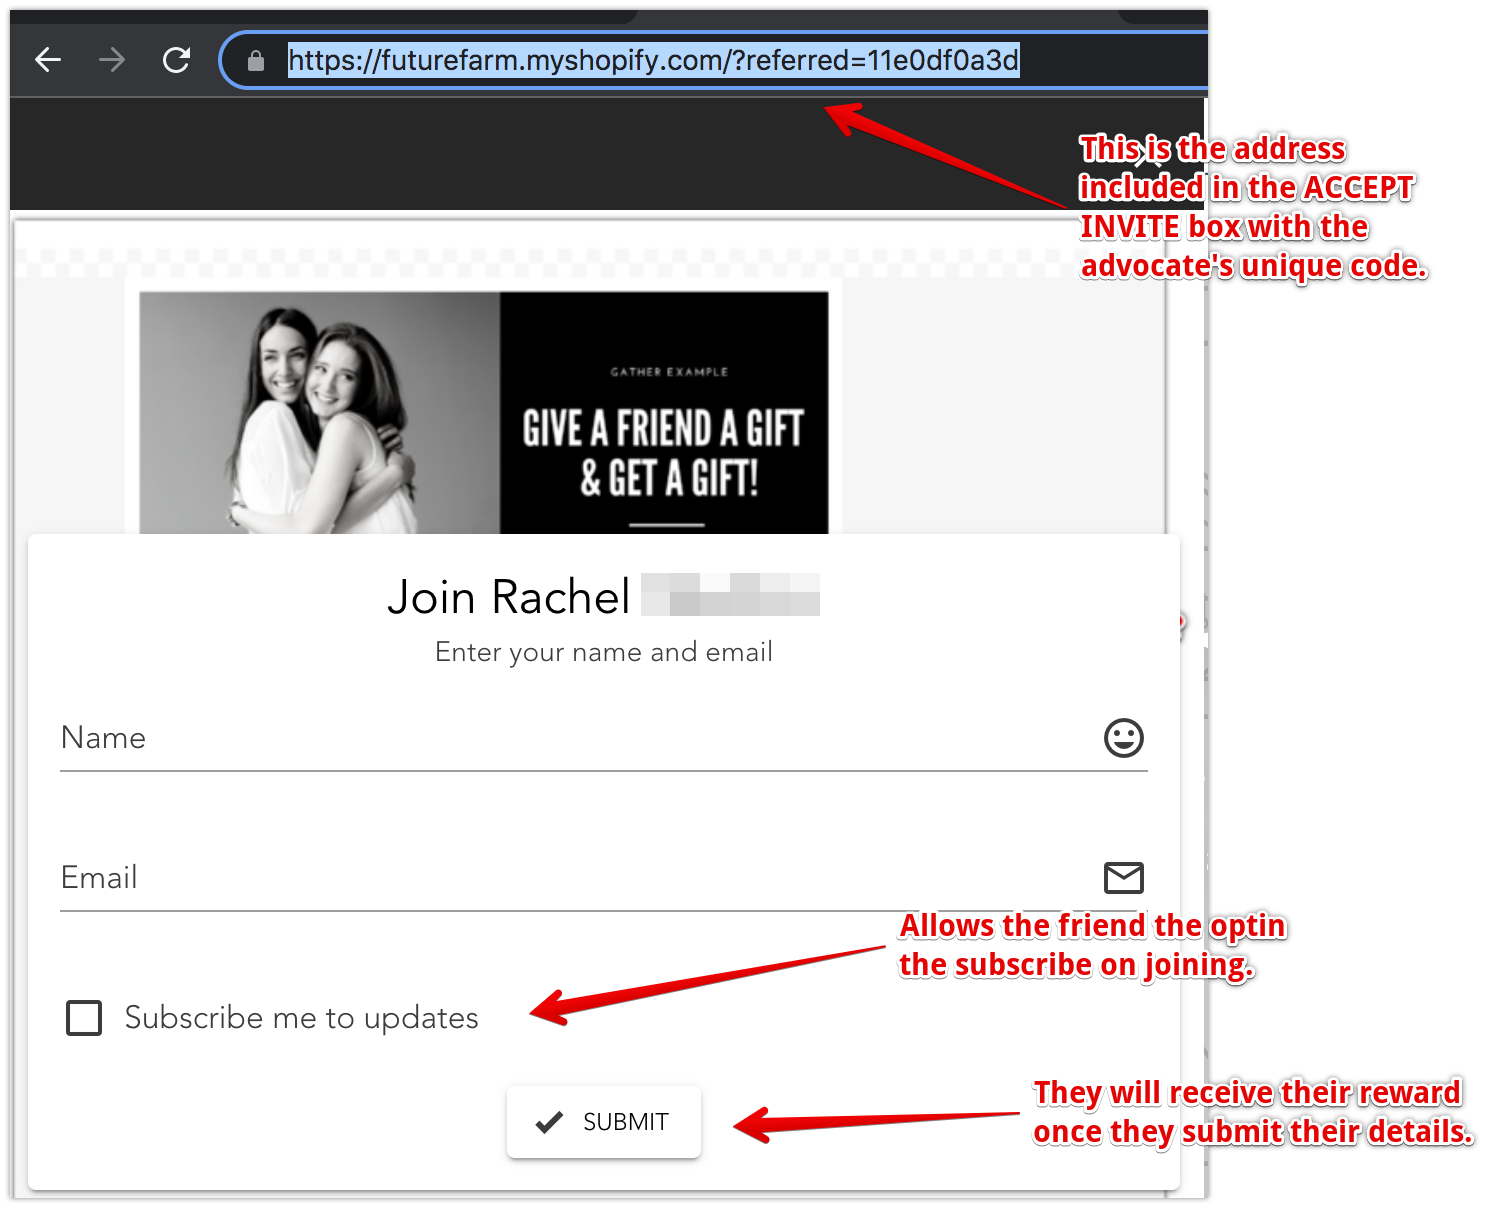
If you want to allow a friend to be able to ‘opt-in’ or subscribe when they accept an email invitation, can change the URL of the accept invite button to open the referral sidebar using the advocate’s unique code. To do this include the URL of the website page you want the friend to land on and the merge tag {{REFERRAL_CODE}} in the editor.
Gather’s email editor takes customisation of your referral program experience to the next level. The preview function takes the guess work out of editing.
If you have any questions about our text editor please contact us at hello@gathercustomers.com.

