Embed your referral experience in your site
Learn how to embed your referral interface in your site.
Here at Gather we are really excited to release this feature; the opportunity to embed your referral campaign interface within your own site. In this article we will walk you step-by-step through the process of enabling this feature on your site.
First, let's enable this feature for your campaign.
Within the Editor section, select the following box and save changes:
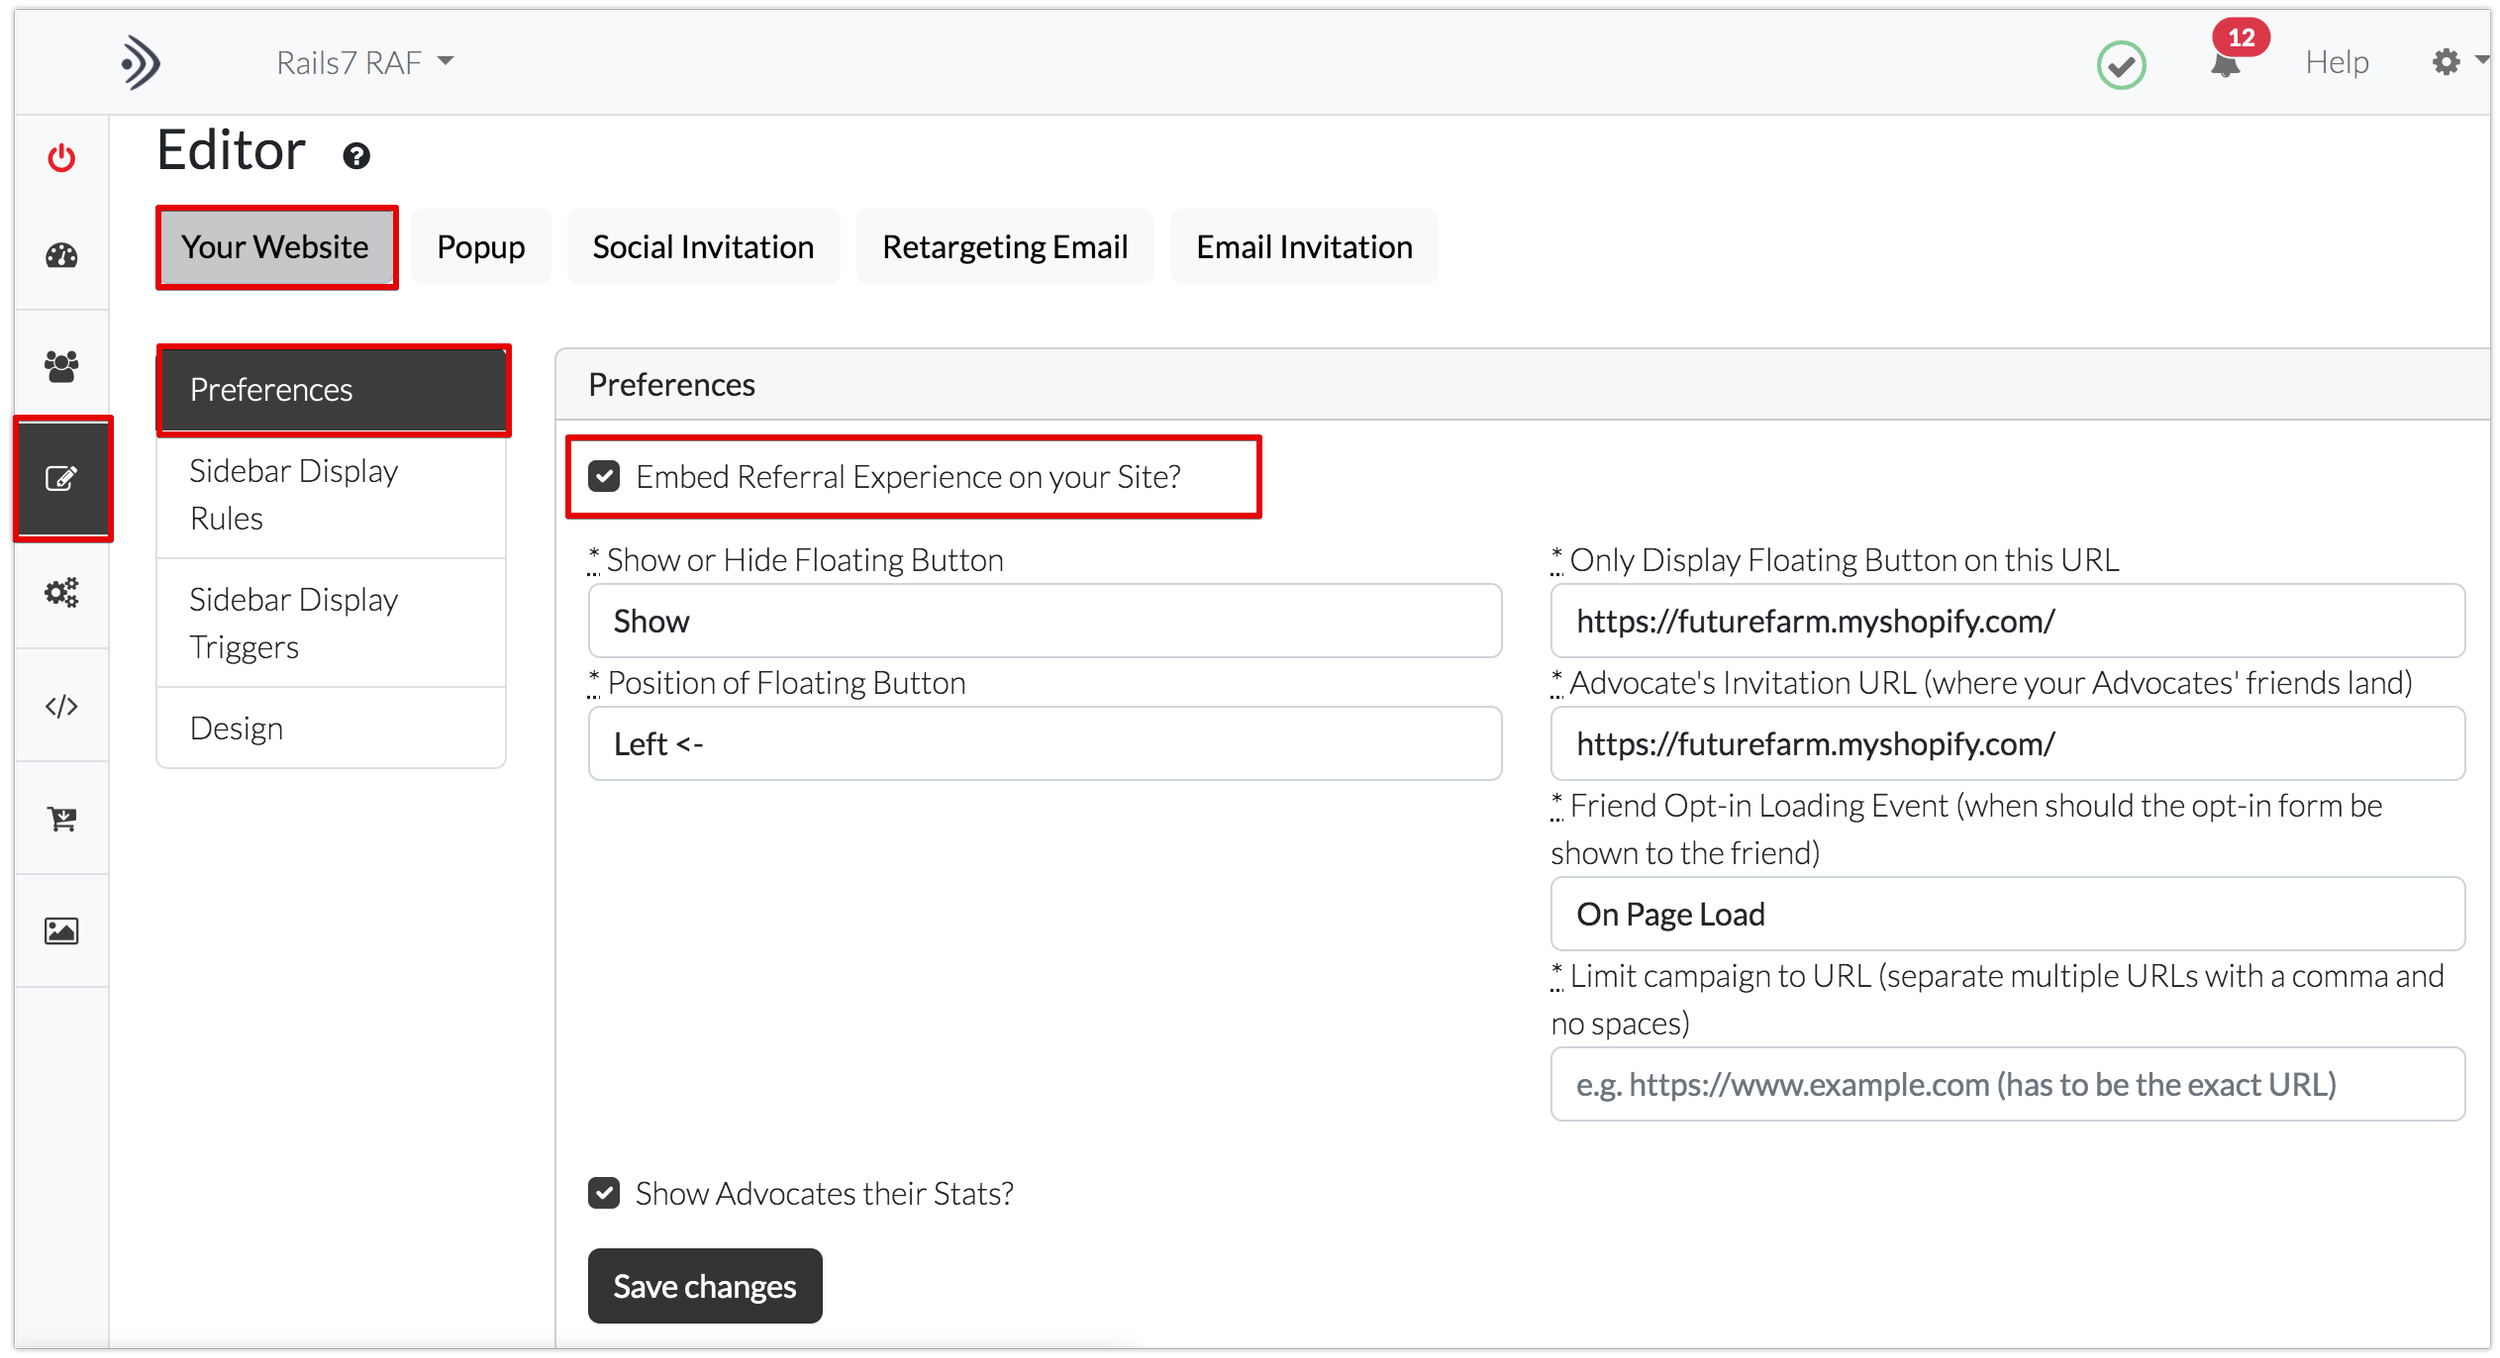
Once you have selected to embed the referral experience on your store the following dropdown questions will appear:
1. Show or Hide Referral Floating Button:
You can choose to either show or hide a floating referral button on your site. If you choose to show the button, it will look like this on your site:

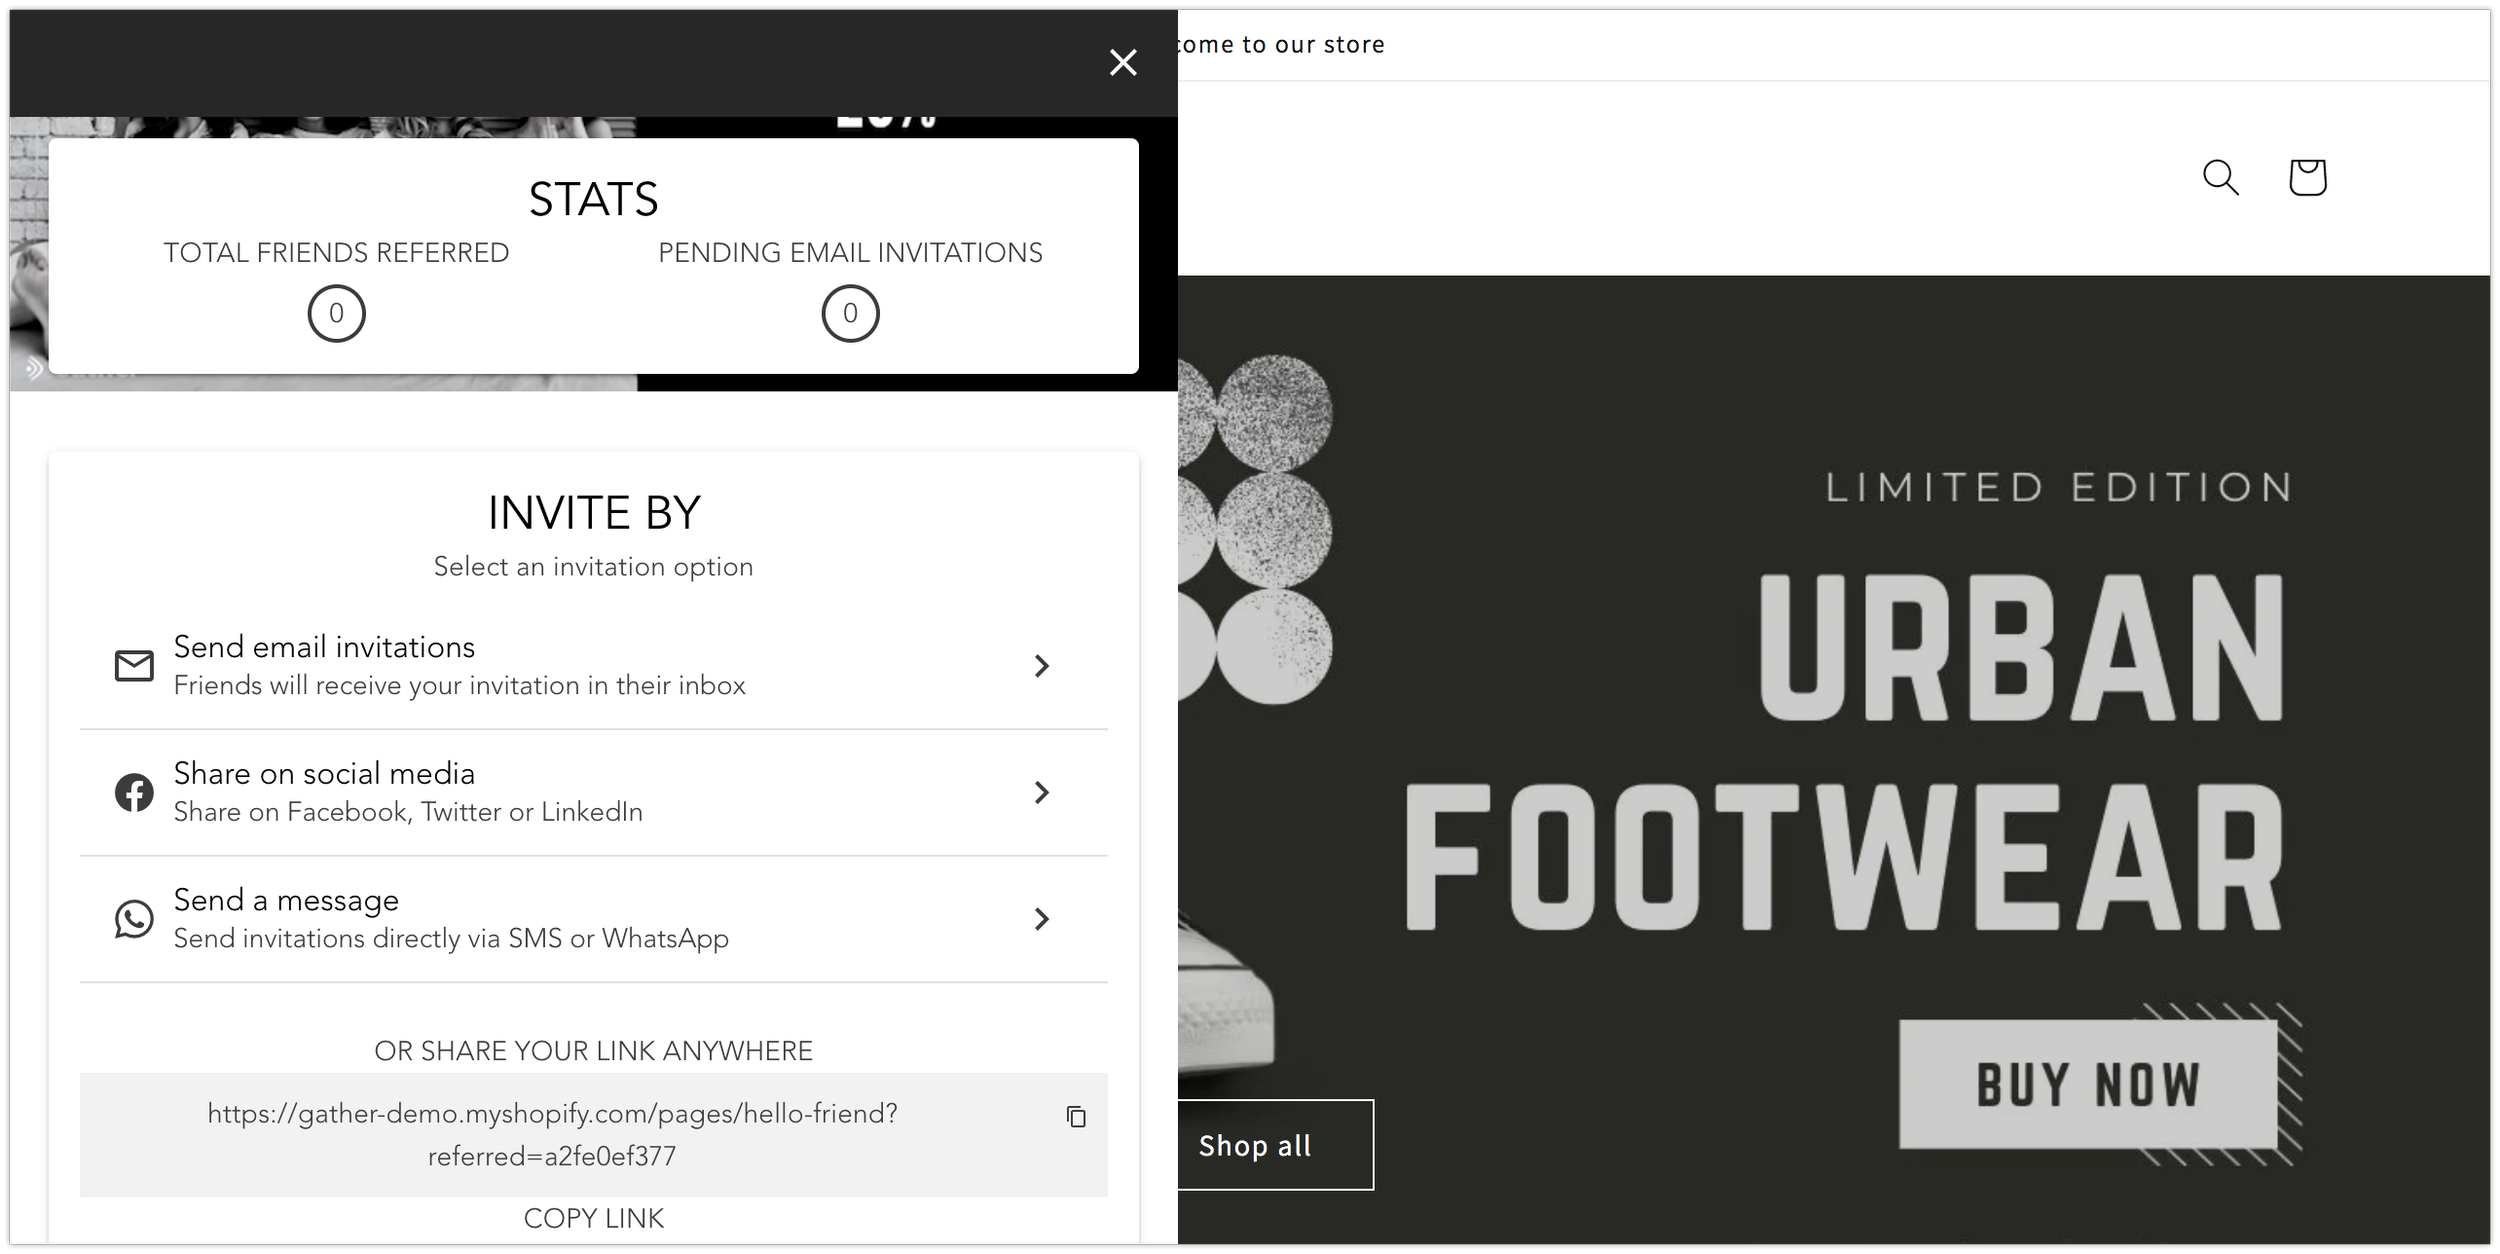
When a visitor to your site clicks on this button the referral sidebar interface will open on your site like this.
Notice here, the banner that opens is the banner you upload for your advocates in the 'Branding' section.

Once your advocate has entered their details, they will be shown the following dashboard in order to assist them in referring their friends.
Regardless of your choice to include the floating button, in the integrate section, there is a link you can provide to customers which will open the referral interface on your site when a customer clicks on the link. See the Advocates call to action section at the bottom of the integrate page.

2. Position of Floating Referral button:
If you opt to show the floating referral button, then here you can choose where the button 'floats' on your page.
You can choose to display the button on the bottom left or right hand side of your site.
3. Only Display Referral Button on this URL:
If you don't want the referral button to appear on every page of your site, or you have a specific URL in mind e.g. A refer a friend landing page, you can enter the page address on which the button appears here.
4. Advocate's Invitation URL:
Here you can specify the page on which your Advocate's friends will land when they click on the link provided. You might wish to include a Friend landing page for your campaign, if so you would include the URL here.
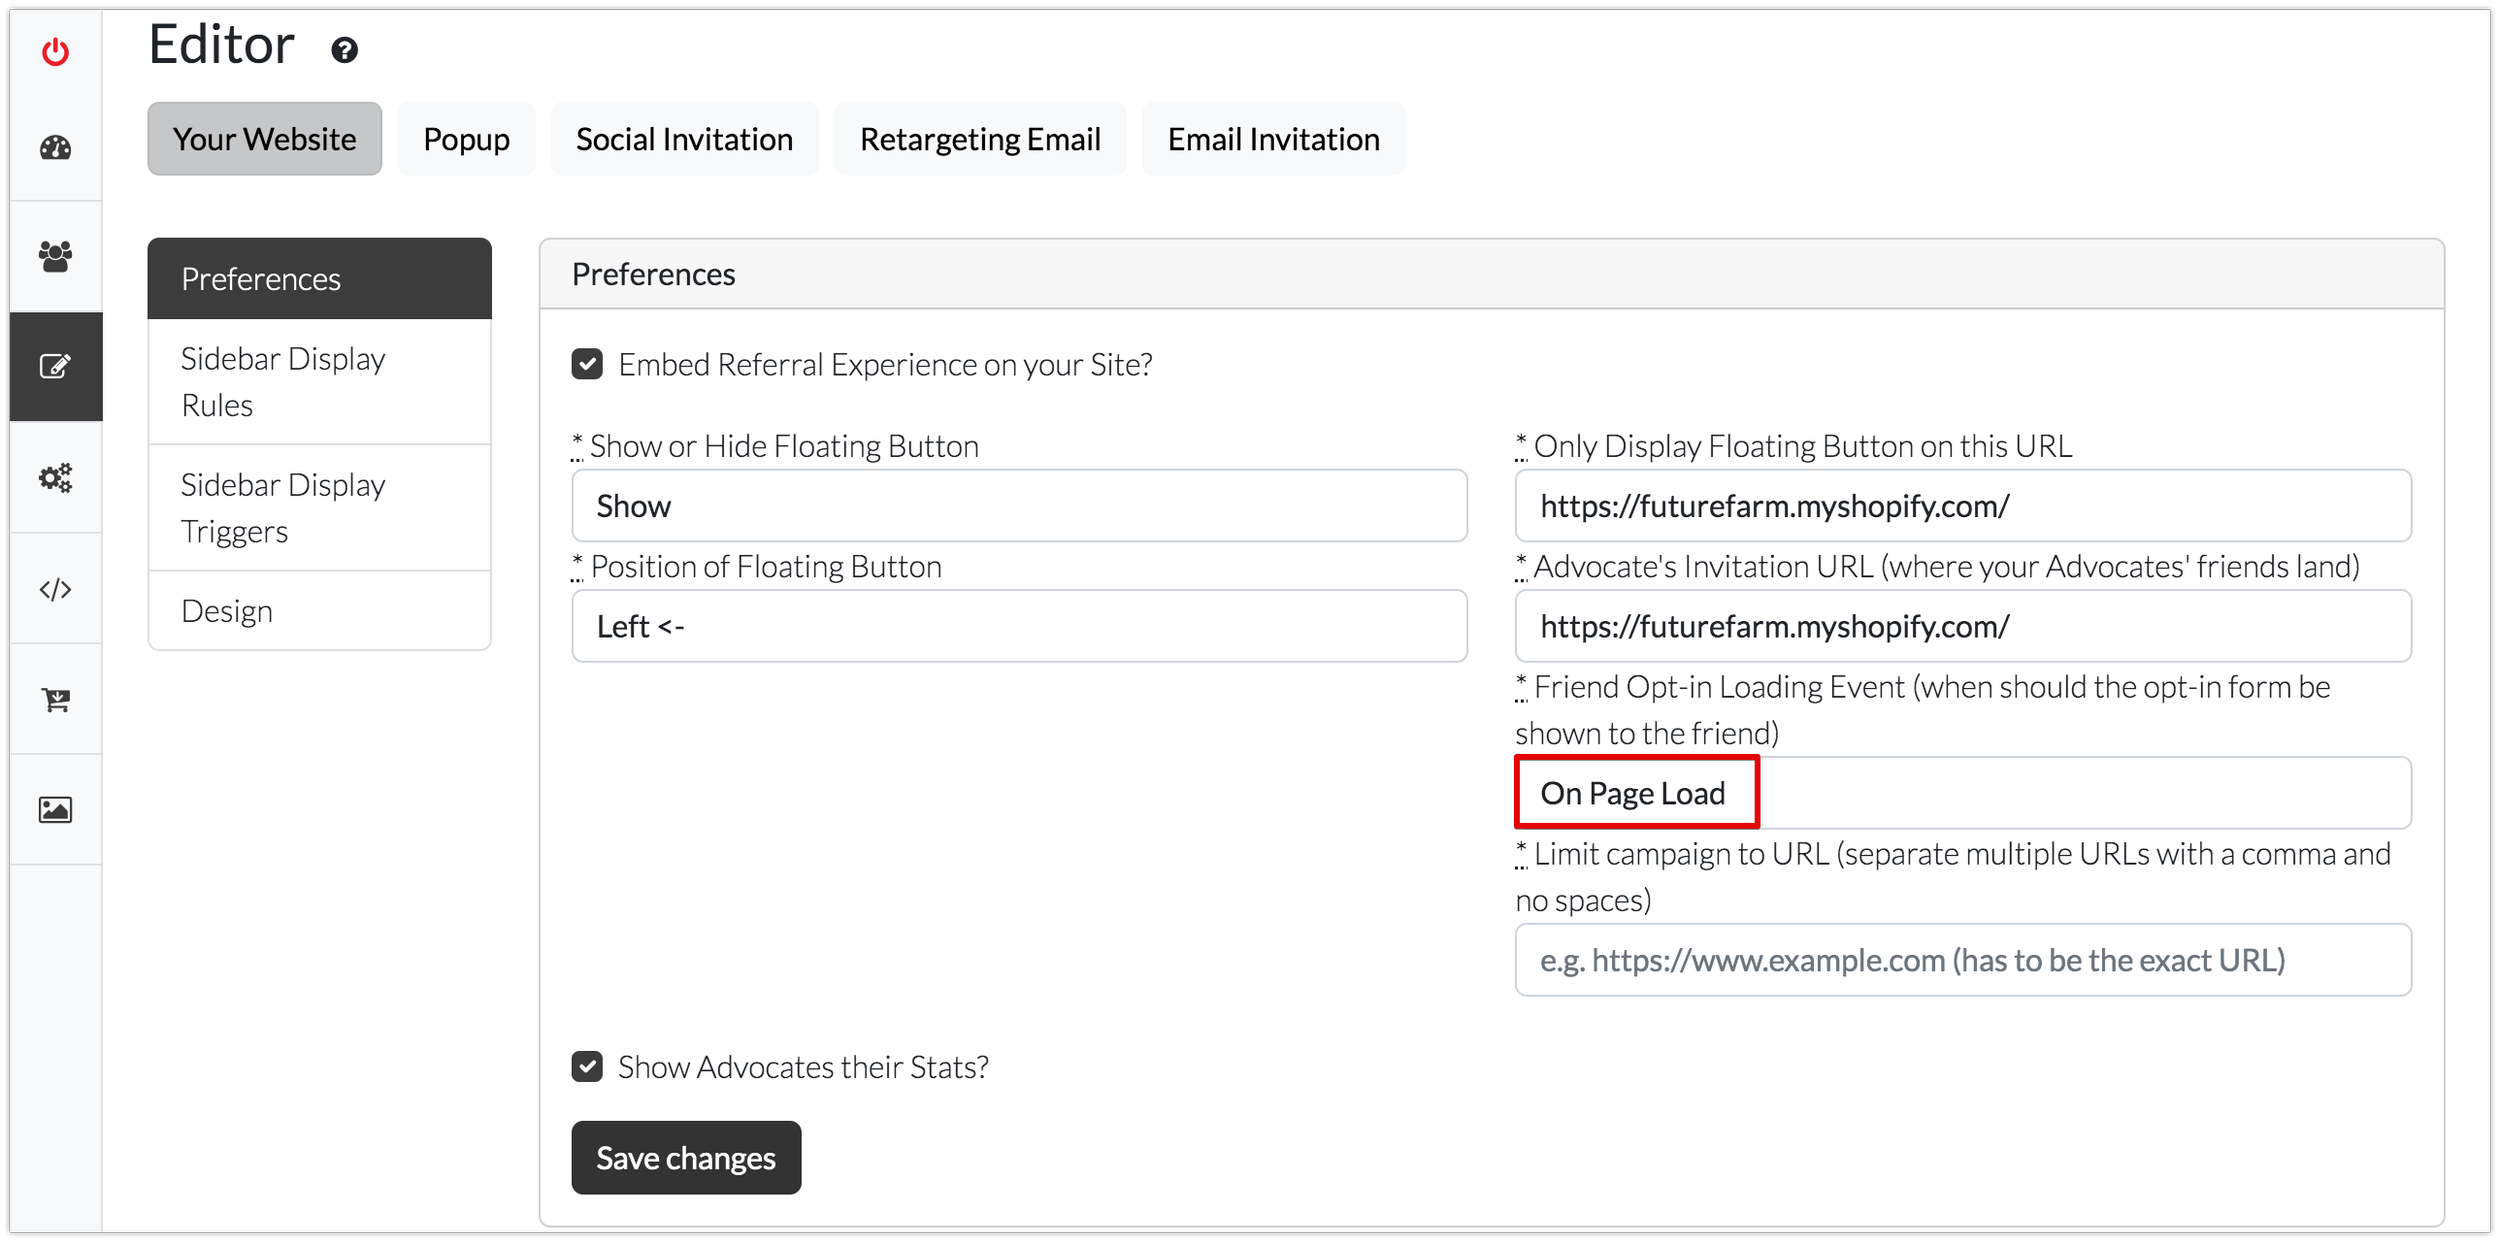
5. Friend Opt-in Loading Event (when should the opt-in form be shown to the friend):
Gather allows you to choose when you want the friend opt-in form to be shown when they click on an advocate’s link. By default, the opt-in form will load on the page when the page is loaded. This will be the page you determine in the ‘Advocate’s invitation URL’ box (point 4 above).
Alternatively, you can also choose to use a JavaScript trigger. For example, you may wish to include a clickable button on a page or have the form load after a period of time. For the code required, click here.
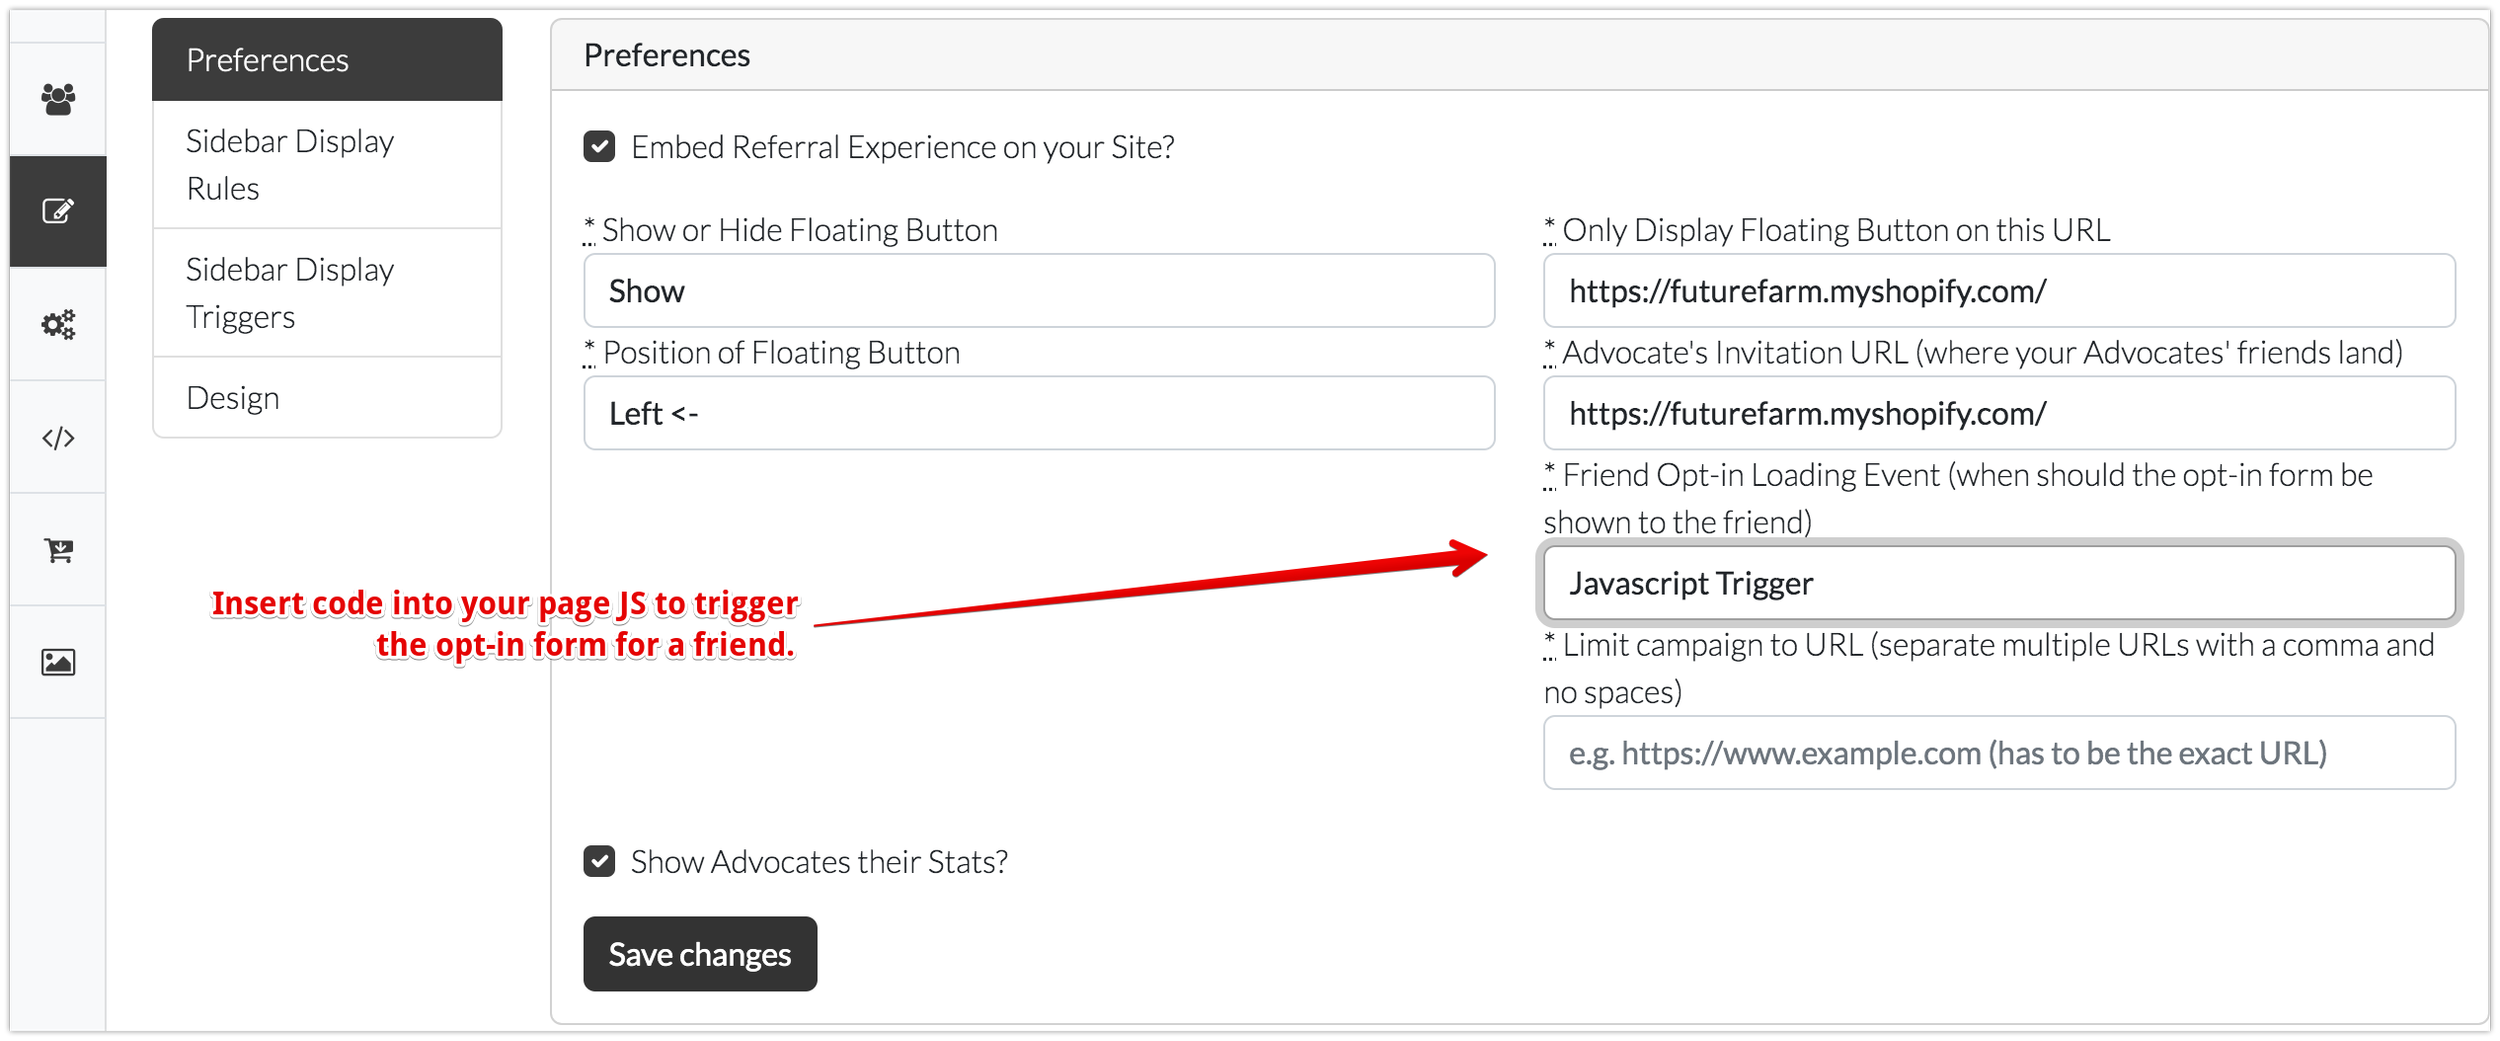
There is also the option not to load the friend opt-in form. You can select this from the drop-down menu.
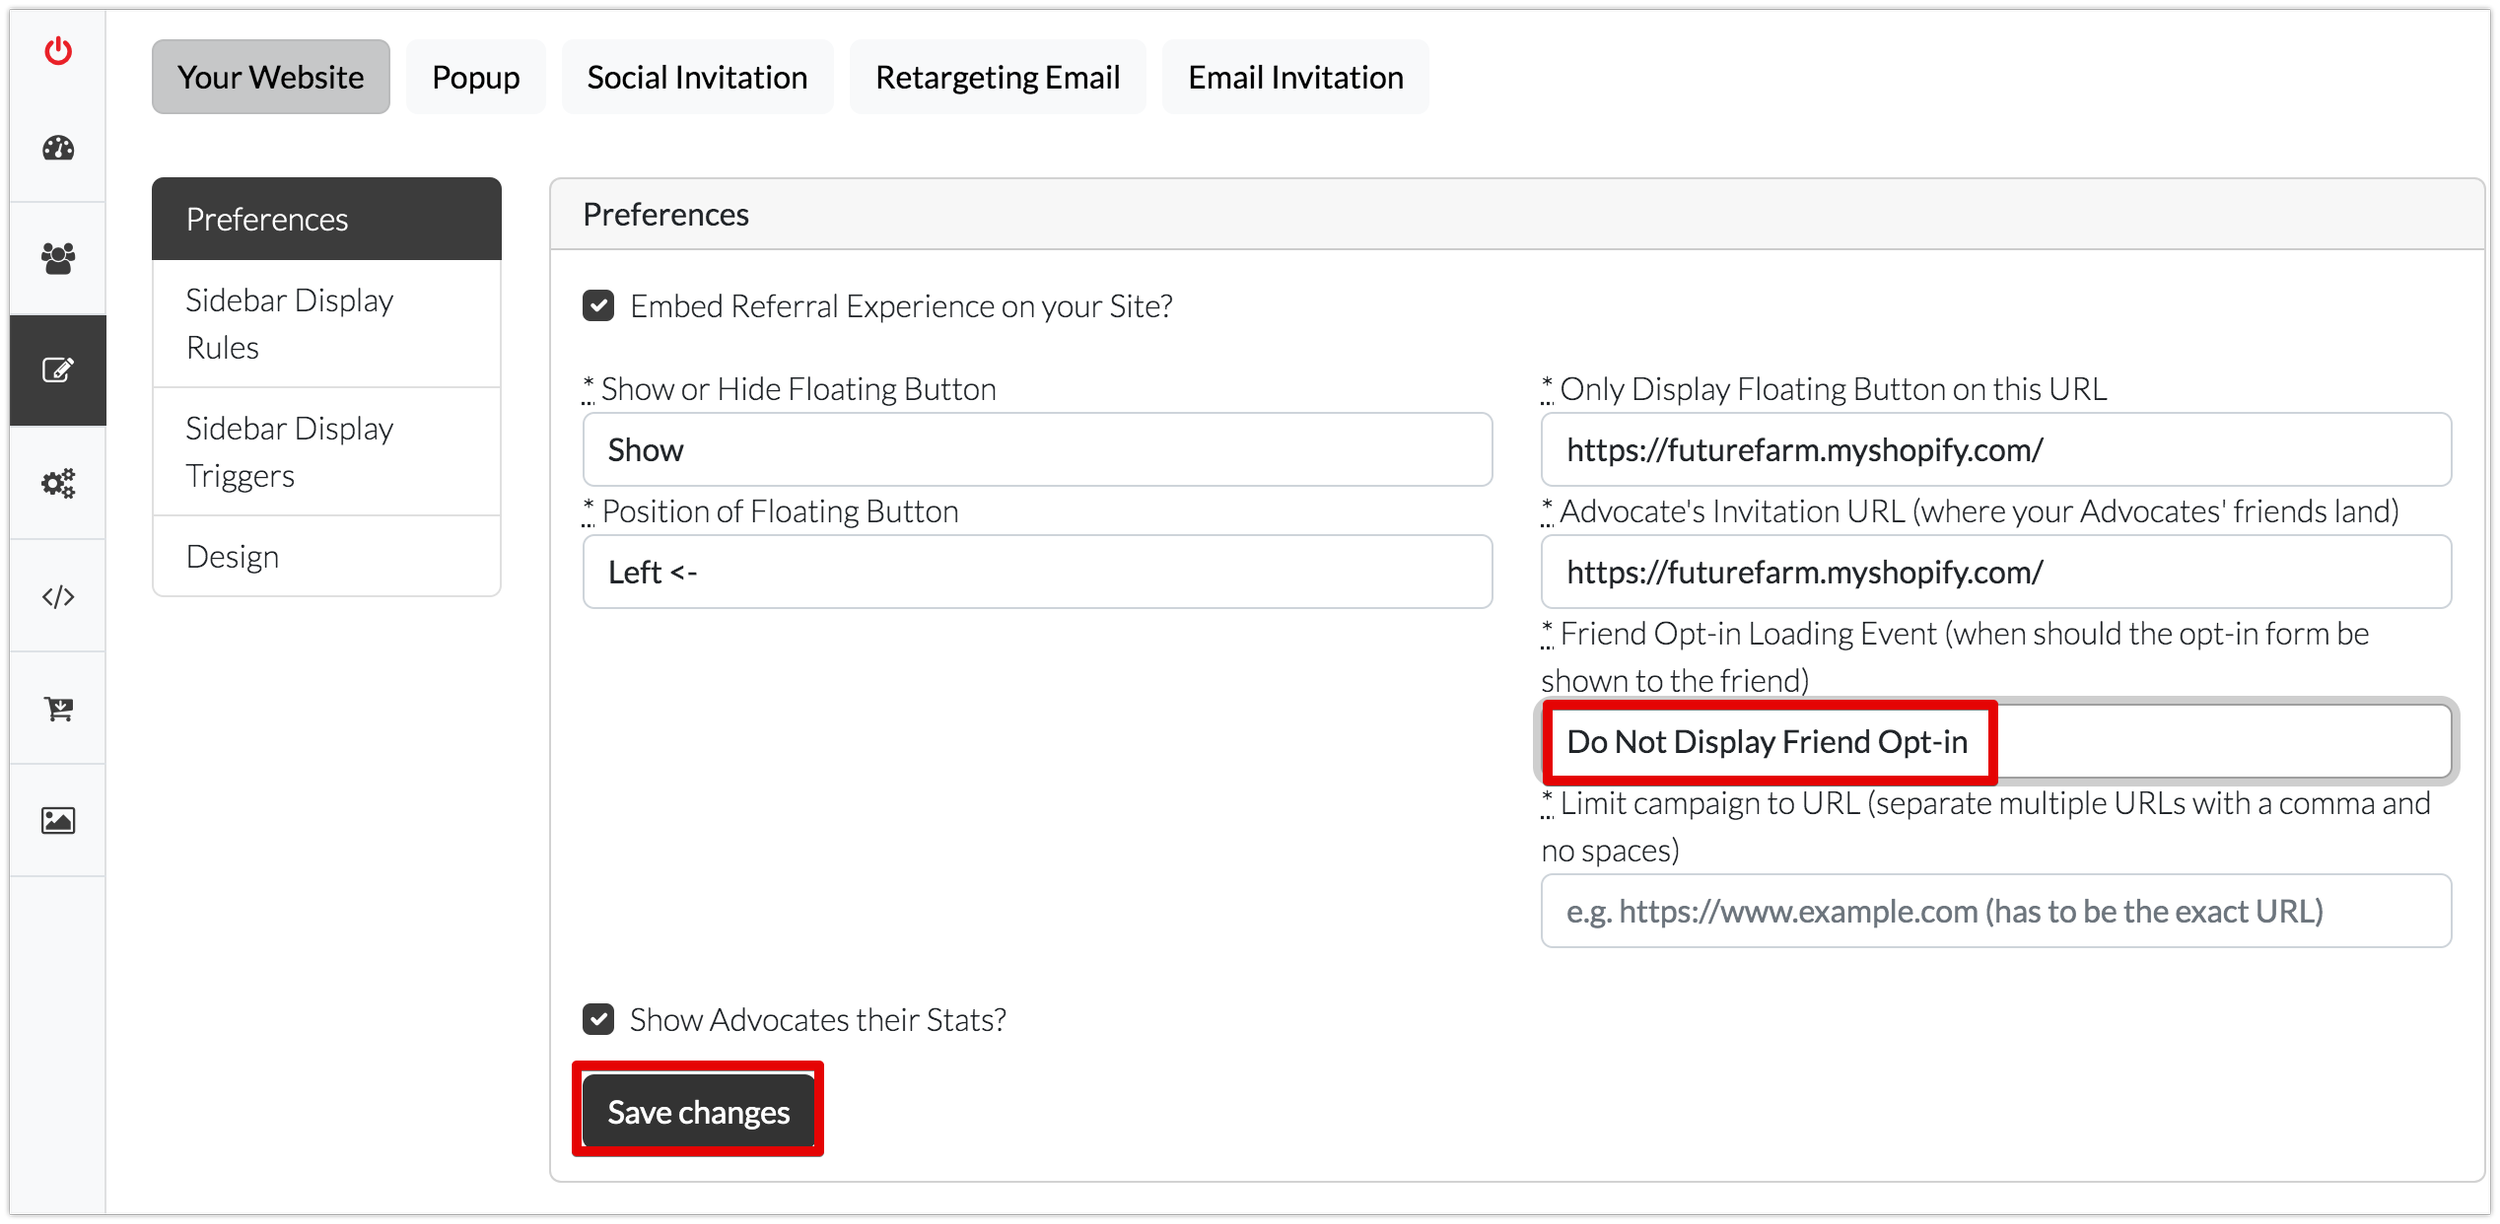
6. Limit campaign to URL (separate multiple URLs with a comma and no spaces):
Gather allows you to limit the pages on which your campaign will be displayed. You can limit it to just one page, or by inserting commas, you can add multiple pages. Please ensure you do not leave a space after the comma.
As with any changes, don't forget to SAVE your preferences and to activate your campaign on your site.
Gather also enables you to make changes to the design of the sidebar that customers and their friends see on your site. For more information check out the following article.
Gather also allows you to embed your referral interface in-line on a page of your website, for details see the following article.
Got any questions? First head to your Gather account, then click on the Help & Support menu item on the left hand side or check out the help articles here at the academy.